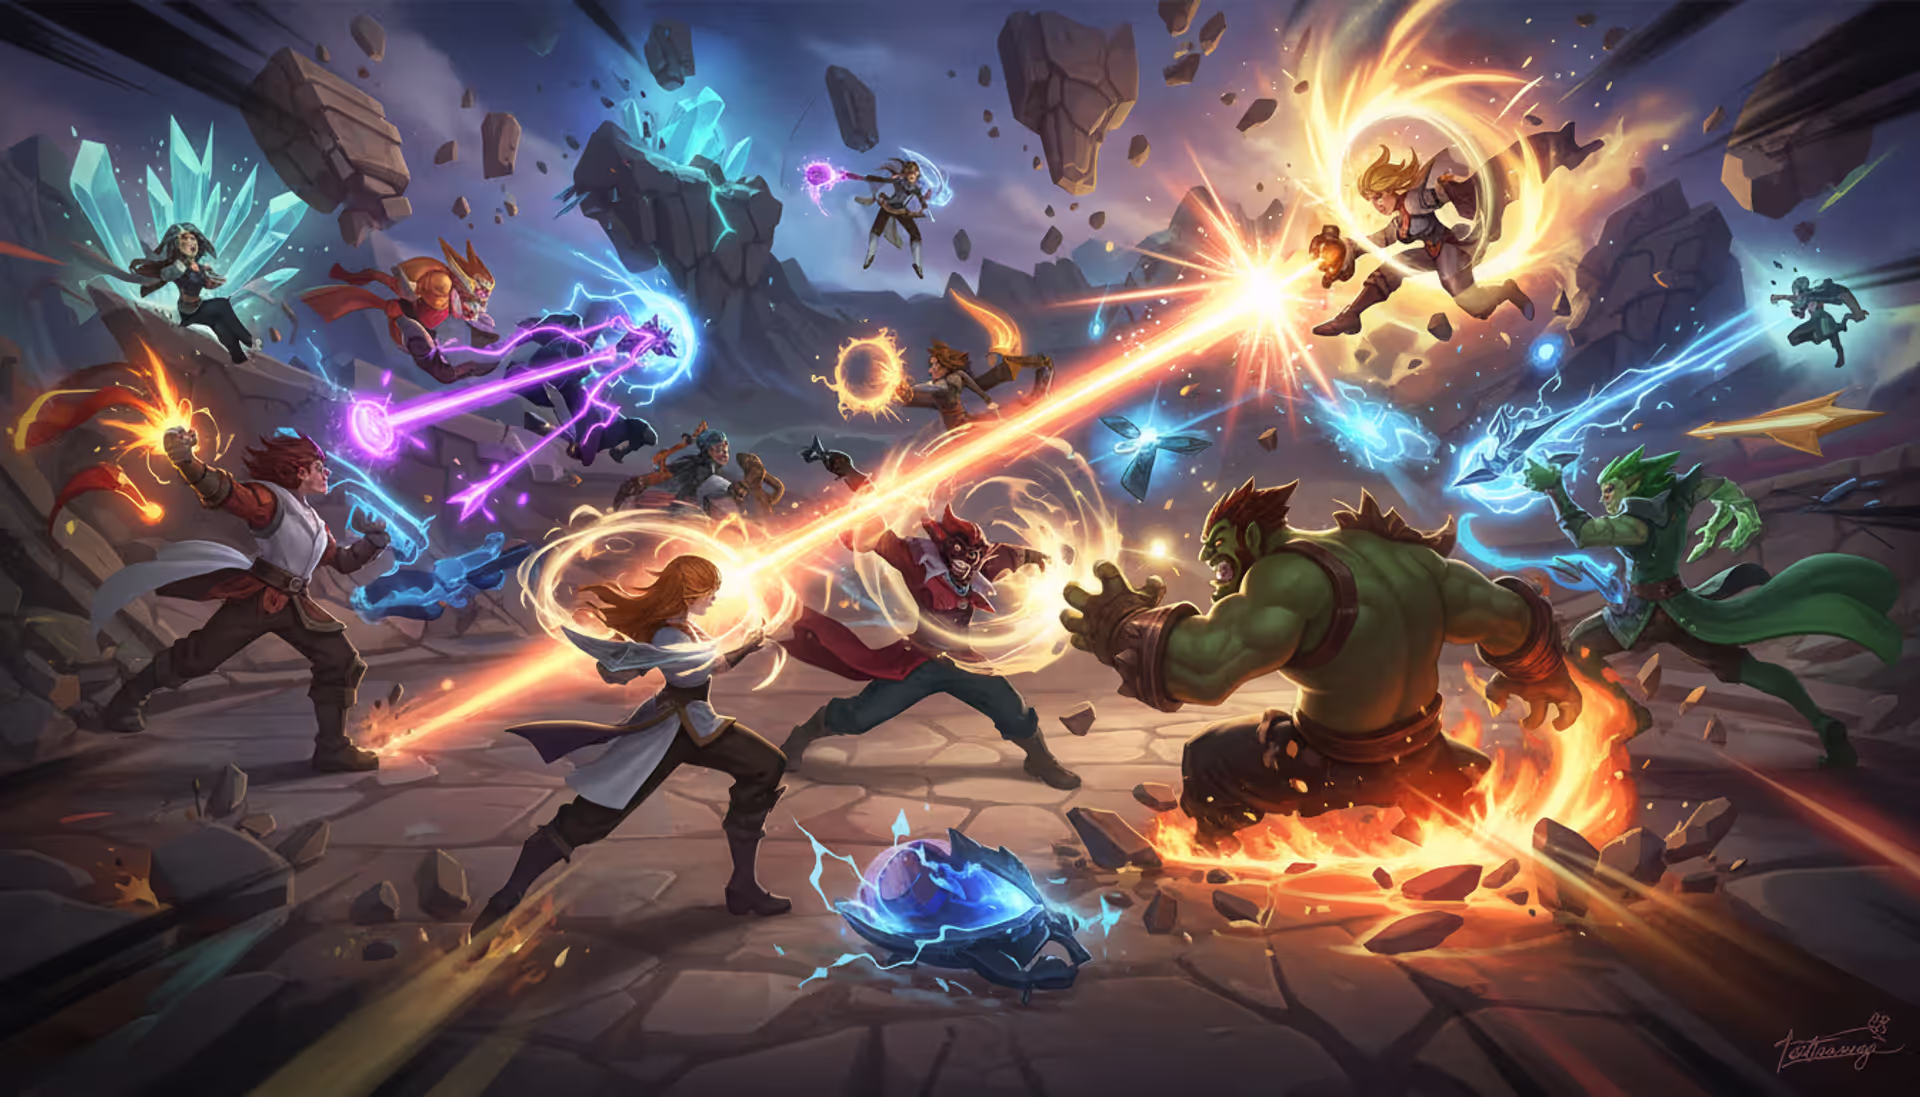
All Random Ultra Rapid Fire strips away the strategic pre-game planning and throws you straight into chaos. You can't choose your champion, mana doesn't exist, and cooldowns barely matter. What separates a 20-minute stomp from a frustrating loss often comes down to understanding which random champion you rolled and how to maximize their kit under URF's unique ruleset.
This guide breaks down which champions thrive when ability haste reaches absurd levels, which picks consistently underperform despite their standard game strength, and how to adapt your strategy when the game hands you a specific playstyle.
What Makes a Champion Strong in ARURF
ARURF operates under modified rules that fundamentally change champion viability. Every champion receives a baseline buff that reduces all cooldowns significantly—roughly equivalent to having massive ability haste from the start. The removal of mana costs means resource-gated champions suddenly spam abilities without consequence, while energy and cooldown-based champions gain less relative advantage.
Champions with low base cooldowns benefit exponentially. A five-second cooldown reduced by 80% becomes one second, allowing for near-permanent uptime on crucial abilities. Compare this to ultimate abilities with two-minute cooldowns—even with massive reduction, they still require strategic timing rather than constant availability.
Crowd control chains become oppressive when cooldowns disappear. A single stun every eight seconds in normal play becomes manageable. That same stun every 1.6 seconds creates situations where opponents never regain control of their champion. Morgana's Dark Binding, already frustrating at normal cooldowns, becomes a near-permanent root when she can throw it every two seconds.
Mobility defines survival in ARURF's burst-heavy environment. Champions with built-in dashes, blinks, or movement speed steroids can reposition constantly, making them nearly impossible to pin down. Kassadin's Riftwalk at reduced cooldown lets him blink across the map every second, while immobile mages become sitting targets for the inevitable Zed or Fizz on the enemy team.
Sustain and healing scale disproportionately well. When a champion can heal every few seconds instead of every ten or fifteen seconds, they effectively gain massive health pools. Soraka throwing Starfall and Astral Infusion on repeat becomes an unkillable healing fountain. Mundo regenerates faster than most champions can damage him.
The ability haste stat itself stacks multiplicatively with ARURF's built-in reduction, though with diminishing returns. Building additional ability haste still provides value, but the difference between 0 and 50 ability haste matters far less than in standard games. Your base cooldowns already sit at a fraction of normal values.
Author: Tyler Vance;
Source: canelomobile.com
S-Tier ARURF Champions You Should Always Play
Zed dominates ARURF through pure assassination potential combined with safety. His Living Shadow cooldown drops to roughly two seconds, giving him constant escape routes and harassment tools. The Death Mark combo deletes squishies before they can react, and his energy system means he never runs out of resources. Land your shurikens, press R, and watch health bars evaporate. The main counterplay—crowd control during his ultimate—becomes harder to execute when he can shadow out immediately after.
Yuumi transforms from a scaling enchanter into an untargetable stat-stick that never stops healing. Attached to any bruiser or tank, she provides constant heals, movement speed, and adaptive force while remaining completely immune to damage. The enemy team needs to kill her host through layers of healing and shielding, then catch her during the brief moment she detaches. Most games, that moment never comes. She turns any competent teammate into a raid boss.
Fizz becomes nearly untargetable with Playful/Trickster available every three seconds. He can dodge almost any incoming ability, reposition aggressively, and his burst damage remains lethal throughout the game. The combination of mobility, invulnerability frames, and assassination potential makes him frustrating to play against and dominant in the right hands. Miss your abilities on him, and you're dead before cooldowns return.
Morgana wins games through crowd control lockdown alone. Her Dark Binding at reduced cooldown creates 2-second roots every few seconds, and her Black Shield blocks the enemy team's crowd control attempts. She doesn't need to build full AP to be effective—just landing bindings on repeat while protecting teammates from CC creates an insurmountable advantage. Pair her with any damage dealer, and the enemy team never moves.
Kassadin reaches his late-game fantasy immediately. Riftwalk spam lets him blink through walls constantly, making him impossible to catch or escape from. His magic damage shield provides surprising durability against AP-heavy compositions, and his burst damage deletes squishies. The main weakness—early game vulnerability—matters less when games accelerate and everyone scales faster.
Maokai becomes an unkillable tank with crowd control on every ability. His Sapling Toss creates zone control every second, his Twisted Advance roots constantly, and his passive heals him faster than most champions can deal damage. He doesn't carry games through damage but through being impossible to kill while locking down priority targets. The enemy team wastes all their cooldowns trying to kill him while his team cleans up.
Shaco excels through map pressure and deception. His Deceive cooldown lets him stealth repeatedly, his boxes create constant zone control, and his clone confuses opponents during chaotic teamfights. He splits pushes effectively, assassinates isolated targets, and generally makes the game miserable for the enemy team. Playing against a competent Shaco feels like fighting two champions simultaneously.
Jax scales into an unstoppable duelist with Counter Strike available constantly. He blocks auto-attacks on repeat, his leap cooldown lets him stick to targets or escape danger, and his damage output remains high throughout the game. He can 1v2 or even 1v3 in side lanes while his team pressures elsewhere. The combination of durability, damage, and mobility makes him a consistent threat.
Author: Tyler Vance;
Source: canelomobile.com
A-Tier and B-Tier Picks Worth Playing
A-Tier champions perform well but lack the overwhelming dominance of S-tier picks. Zoe lands Sleep bubbles frequently enough to create picks, though mobile champions still avoid her damage. Lux provides long-range poke and crowd control but dies instantly if caught. Ezreal kites effectively with constant Arcane Shifts but needs time to scale his damage. Master Yi runs down isolated targets but struggles against coordinated crowd control chains.
These champions win games when piloted correctly and paired with complementary team compositions. They're not auto-win picks, but they're far from liabilities.
B-Tier champions require specific circumstances or team compositions to shine. Nasus stacks his Siphoning Strike faster than normal games but still needs time before becoming a threat. Twisted Fate provides global pressure with Destiny, though his damage output lags behind true carries. Nautilus locks down single targets effectively but lacks the multi-target crowd control of higher-tier tanks.
Playing B-tier picks successfully means understanding their win conditions and playing around them. Nasus needs his team to stall until he reaches critical stacks. Twisted Fate needs teammates who can follow up on his Destiny plays. These champions can win, but they demand more from both the player and their team.
Author: Tyler Vance;
Source: canelomobile.com
Champions to Avoid in ARURF Mode
Some champions that dominate Summoner's Rift become liabilities in ARURF's accelerated environment. Understanding why helps you adapt when the random selection gives you a weak pick.
Udyr suffers from being a stat-check champion in a mode where everyone has enhanced stats. His lack of gap closers means mobile champions kite him endlessly, and his damage output doesn't match burst-oriented picks. He runs at people and hopes to reach them—a strategy that fails against competent opponents.
Garen faces similar issues. His silence and spin-to-win strategy works in normal games where cooldowns matter. When enemies can dash away every few seconds and his tankiness gets shredded by percentage-based damage, he becomes a non-factor. He's not unplayable, but he's severely outclassed.
Ivern loses his identity as a supportive jungler when everyone scales faster and games end quickly. His utility can't match the raw power of damage dealers or the lockdown potential of crowd control tanks. He provides shields and bushes while the enemy Zed one-shots his entire team.
Kalista requires perfect auto-attack mechanics to function, and ARURF's chaotic teamfights make consistent kiting nearly impossible. Her power budget sits in sustained damage output, but burst damage rules this mode. She dies before getting enough attacks off to matter.
Ryze needs time to scale and execute his machine-gun spell rotation. The problem? He's immobile, squishy, and his damage ramp-up takes too long when everyone else deletes targets instantly. His Realm Warp utility provides some value, but better champions exist for nearly every situation.
When you roll a weak champion, focus on utility over carrying. Provide crowd control for your teammates, split push to create pressure, or play for picks rather than teamfights. You probably won't carry, but you can avoid being the reason your team loses.
ARURF Champion Strategies by Playstyle
Best Burst Damage Champions
Burst damage champions thrive by deleting targets before counterplay becomes possible. Syndra lands her full combo every few seconds, creating constant threat. Veigar stacks AP faster and cages opponents repeatedly. LeBlanc chains her abilities with minimal downtime, making her slippery and lethal simultaneously.
The strategy revolves around ability rotation optimization. Don't waste cooldowns on tanks—wait for squishies to misposition, then unload everything. Build penetration early since everyone gains defensive stats faster in ARURF. Missing your burst combo matters less when cooldowns return in seconds, but landing it consistently wins games.
Author: Tyler Vance;
Source: canelomobile.com
Sustain and Healing Dominance
Sustain champions win through attrition. Soraka, Sona, and Nami provide endless healing that keeps teammates alive through impossible situations. Mundo, Warwick, and Volibear heal themselves faster than enemies can damage them, creating unkillable frontlines.
The counterplay—Grievous Wounds items—becomes mandatory against healing compositions. But even with 60% healing reduction, constant heal spam provides enough value to swing fights. Play around your healing cooldowns, position to maximize sustain uptime, and force extended fights where your healing advantage compounds.
High Mobility Outplay Picks
Mobility champions frustrate opponents through positioning advantages. Yasuo dashes through minion waves constantly, making him nearly impossible to hit with skillshots. Katarina resets her Shunpo on every kill or assist, bouncing around teamfights. Rakan engages and disengages at will with his multiple dashes and charm.
Playing mobility champions well means recognizing when you're out of position before it becomes fatal. Just because you can dash doesn't mean you should. Use mobility to bait cooldowns, then re-engage when enemies have nothing left. The best mobility players make opponents waste everything on dodges, then clean up for free.
Building and Itemizing for ARURF Success
We don't balance URF for competitive integrity. We balance it to maximize the moments where you feel powerful, even if that means some champions become overwhelming. The chaos is the poin
— Riot Lutzburg
Item builds in ARURF prioritize immediate power spikes over scaling. Games rarely last long enough for six-item builds to matter, so focus on two or three core items that maximize your champion's strengths.
Ability haste remains valuable despite diminishing returns. The difference between 80% cooldown reduction and 85% feels small, but that extra fraction of a second can mean landing one more rotation in a fight. Prioritize ability haste on champions with powerful basic abilities—Zed, Fizz, Kassadin—but skip it on champions whose power comes from raw stats.
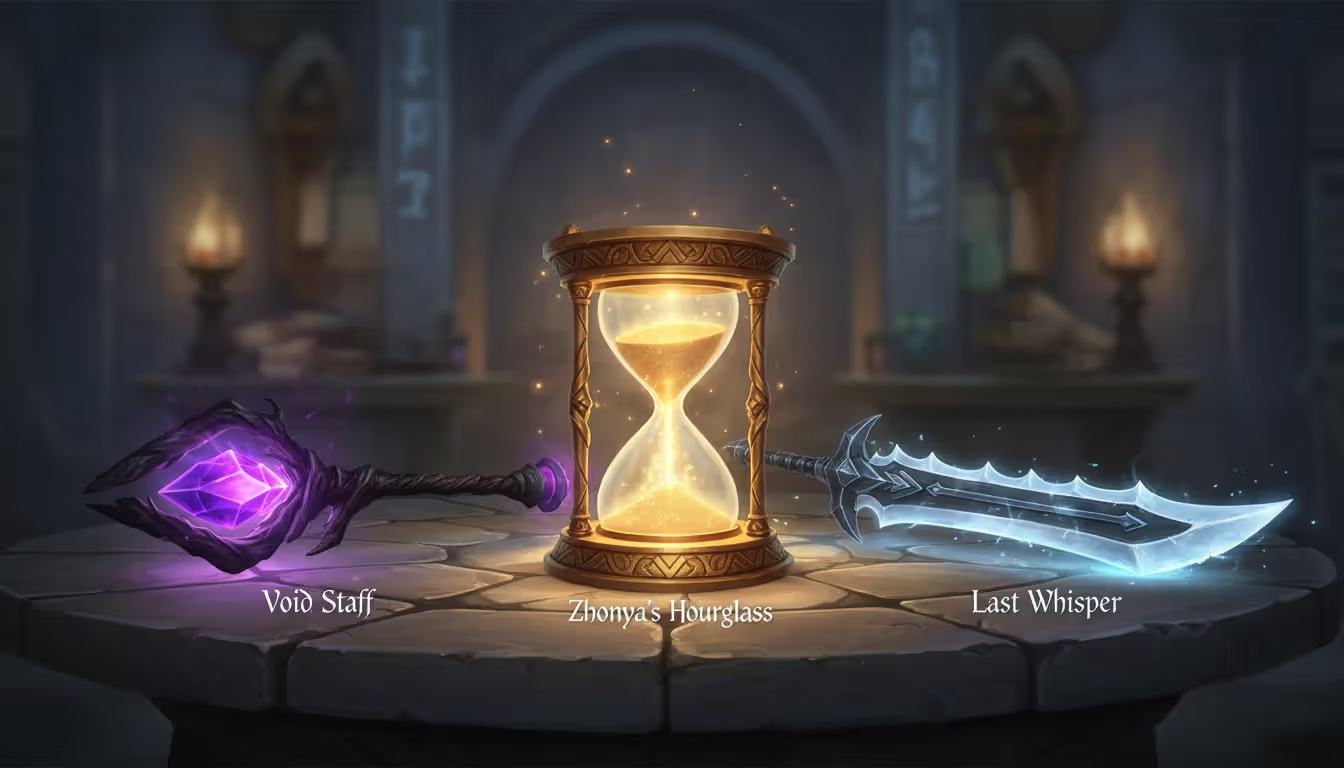
Penetration items provide more value than pure damage. Enemies gain defensive stats quickly, so Last Whisper, Void Staff, or Black Cleaver become essential purchases. Building a third Lethality item often provides less value than penetration against their scaling armor.
Defensive items matter more than players expect. Zhonya's Hourglass and Guardian Angel give you extra lives in a mode where getting caught once ends your participation in a fight. Sterak's Gage and Maw of Malmortius provide burst protection for bruisers and assassins who need to survive initial engagements.
Avoid gold-inefficient items that rely on long-term scaling. Manamune and Tear items provide zero value since mana doesn't exist. Mejai's Soulstealer and Dark Seal can work, but losing stacks hurts more in ARURF's high-kill environment. Stick to reliable power spikes.
Boots matter less than normal games since everyone moves faster baseline. Consider skipping boots entirely on some champions, investing that gold into combat stats instead. If you do buy boots, prioritize Sorcerer's Shoes or Plated Steelcaps—the raw stats matter more than movement speed.
Champion Name
Tier
Primary Role
Win Rate Estimate
Difficulty
Key Strength
Zed
S
Assassin
54%
Medium
Constant shadow mobility and burst
Yuumi
S
Enchanter
56%
Low
Untargetable healing fountain
Fizz
S
Assassin
53%
Medium
Repeated invulnerability frames
Morgana
S
Mage/Support
52%
Low
Permanent crowd control lockdown
Kassadin
S
Assassin/Mage
55%
Medium
Infinite blink mobility
Maokai
S
Tank
51%
Low
Unkillable with constant CC
Shaco
S
Assassin
52%
High
Map pressure and deception
Jax
S
Fighter
53%
Medium
Dueling power with Counter Strike spam
Zoe
A
Mage
50%
High
Long-range picks with Sleep
Lux
A
Mage
49%
Low
Safe poke and zone control
Ezreal
A
Marksman
50%
Medium
Constant mobility and poke
Master Yi
A
Assassin
51%
Low
Cleanup potential with resets
Nasus
B
Fighter
47%
Low
Late-game scaling threat
Twisted Fate
B
Mage
48%
Medium
Global pressure with Destiny
Nautilus
B
Tank
46%
Low
Single-target lockdown
Udyr
D
Fighter
42%
Low
Immobile stat-check champion
Garen
D
Fighter
43%
Low
Lacks mobility and burst
Ivern
D
Support
40%
Medium
Utility doesn't match damage meta
Frequently Asked Questions About ARURF Tier Lists
How often does the ARURF tier list change with patches?
ARURF tier lists shift with major champion reworks and significant balance changes, but the mode itself receives limited direct updates. When Riot adjusts base champion kits or items, those changes affect ARURF performance. The core S-tier champions remain relatively stable because their dominance comes from fundamental kit design rather than numerical tuning. Expect minor tier shifts every few patches, but wholesale changes happen only when Riot specifically targets URF mode balance.
What are the best ARURF champions for beginners?
Morgana, Maokai, and Sona provide the most value with minimal mechanical skill. Morgana just needs to land bindings, Maokai becomes unkillable while providing crowd control, and Sona heals and buffs by existing near teammates. Avoid mechanically intensive champions like Zed, Yasuo, or Katarina until you understand ARURF's pace. High-skill champions amplify mistakes in this mode's chaotic environment.
Which champions should I ban in ARURF mode?
Yuumi deserves a ban in almost every game. She removes interactivity by becoming untargetable while providing infinite sustain. Zed and Fizz warrant bans if your team lacks crowd control or defensive tools. Shaco bans prevent split-push frustration. Generally, ban champions that remove counterplay entirely rather than those that are merely strong. You can outplay a fed Kassadin; you can't interact with an attached Yuumi.
Is ARURF balanced across all roles?
No. Assassins and burst mages dominate while traditional marksmen and supportive champions struggle. The mode's design favors high burst damage and mobility over sustained damage and utility. Tanks with crowd control perform well, but tanks that rely purely on soaking damage become irrelevant. Support champions only succeed if they provide healing or hard crowd control—enchanters that buff stats provide less value than enchanters that heal constantly.
What's the difference between fun picks and competitive picks in ARURF?
Competitive picks maximize win rate through proven strategies. S-tier champions consistently dominate regardless of player skill. Fun picks prioritize entertainment value over efficiency—AP Blitzcrank, full movement speed Rammus, or lethality Sion provide laughs but lose games. The distinction matters less in ARURF than ranked play since the mode is inherently casual, but understanding which category your champion falls into helps set realistic expectations.
How does ability haste work differently in URF modes?
ARURF applies a multiplicative cooldown reduction to all champions before ability haste calculations. Your abilities start with roughly 80% cooldown reduction baseline, then ability haste stacks on top of that reduced cooldown. This creates diminishing returns—the difference between 0 and 50 ability haste provides less relative value than in normal games. Building ability haste remains worthwhile on cooldown-dependent champions, but raw damage or penetration often provides better returns per gold spent.
ARURF's random champion selection means you can't control your pick, but you can control how you play it. Understanding which champions dominate and why helps you maximize weak rolls and exploit strong ones. When you get an S-tier champion, play aggressively and force fights around your power spikes. When you get a weak champion, focus on enabling teammates and avoiding deaths.
The mode rewards game knowledge over mechanical skill. Knowing that your Morgana binding locks down enemies for teamfights matters more than perfect combo execution. Recognizing that your Udyr can't reach mobile champions helps you adjust your strategy toward split-pushing instead of teamfighting.
Build items that complement your champion's strengths, avoid picks that lack mobility or burst damage, and remember that ARURF rewards aggression. Sitting back and farming leads to getting overwhelmed by the enemy team's constant pressure. Push your advantages, take risks, and enjoy the chaos that comes with cooldowns barely existing.
The tier list provides a framework, but adaptation wins games. Play around your team's composition, identify the enemy team's win conditions, and adjust your strategy accordingly. Some games you'll roll Yuumi and coast to victory. Other games you'll get Udyr and need to split-push while your team holds 4v5. Both situations require different approaches to maximize your win rate.
Vault 22 stands as one of the most atmospheric and challenging locations in Fallout: New Vegas. This comprehensive guide covers all five vault levels, enemy combat strategies, key item locations, and the moral choices in There Stands the Grass quest
Planning your primogem budget in Genshin Impact requires more than luck—it demands strategy, patience, and accurate information about which characters are coming and when. With HoYoverse maintaining a steady release schedule through 2026, knowing the banner rotation helps you avoid regret
Thresh excels in ARAM with his versatile kit offering crowd control and playmaking. This guide covers optimal Aftershock runes, tank builds prioritizing Locket, hook prediction techniques in tight spaces, lantern coordination for saves and engages, and Flay combos for peel versus engage scenarios
The Open Hand Temple murder mystery in Baldur's Gate 3 requires careful investigation to identify the real killer. Learn how to find all clues, interrogate suspects correctly, and follow the trail to Ilessan Hills for the complete solution and best rewards
The content on this website is provided for general informational and educational purposes only. It is intended to explain concepts related to video games, gaming guides, builds, mobile gaming, multiplayer strategies, and gaming history.
All information on this website, including articles, guides, and examples, is presented for general educational and entertainment purposes. Gameplay outcomes, strategies, and performance may vary depending on player skill, game updates, and platform.
This website does not provide professional advice or guarantee game outcomes, and the information presented should not be used as a substitute for official game documentation or developer guidance.
The website and its authors are not responsible for any errors or omissions, or for any outcomes resulting from decisions made based on the information provided on this website.