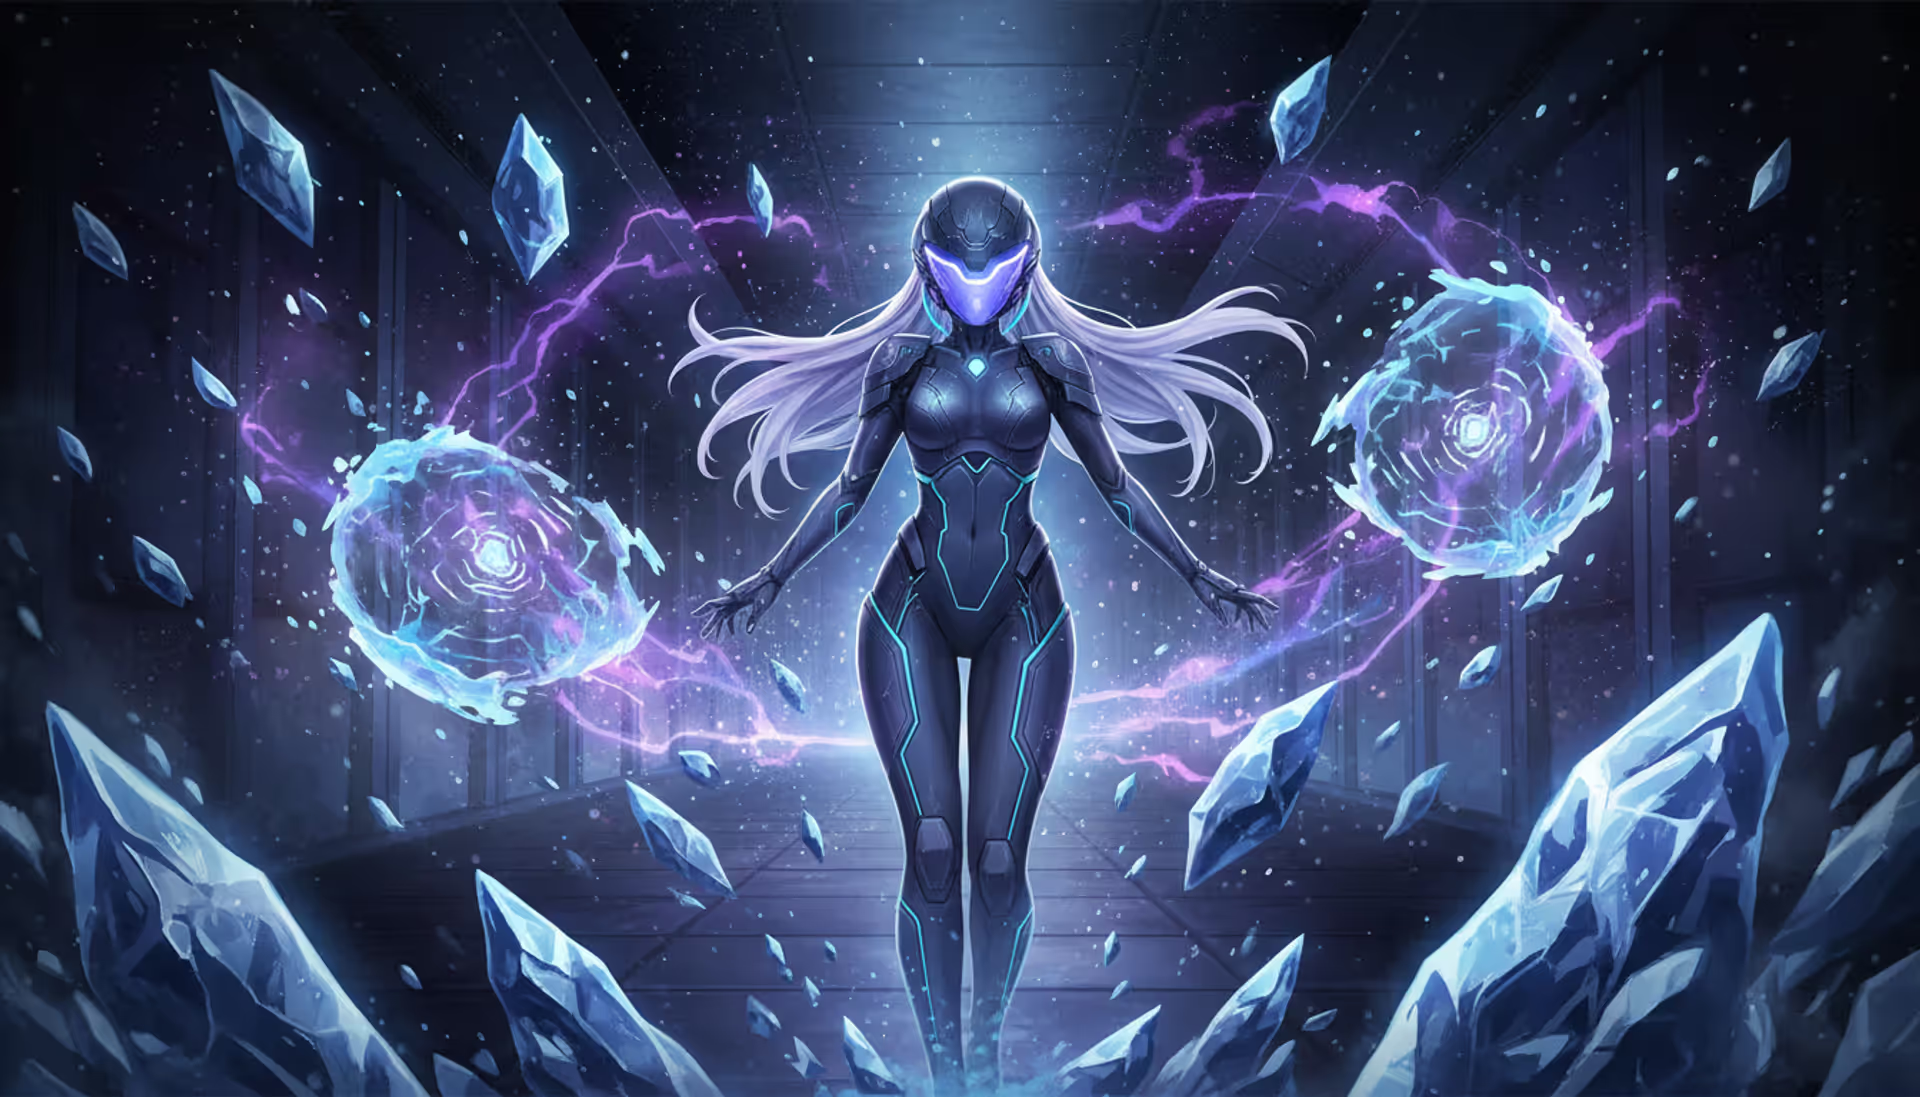
Anime-style female character in futuristic quantum-themed armor surrounded by ice shards and glowing purple temporal fractures in a dark cosmic corridor
You know how most Quantum characters just delete health bars? Castorice does something weirder—and honestly more interesting. She joined Honkai: Star Rail's roster as a five-star limited character who freezes enemies in place while chipping away at their HP. Think of her as the character who presses pause on dangerous situations while your team sets up their big plays.
Getting her build right matters way more than you'd expect. Mess up her stats, and she'll barely freeze anything. Nail the setup, and she'll control Memory of Chaos floors while dealing solid damage herself. Let's dig into exactly how to make that happen.
Who Is Castorice and How Does She Work in HSR
Castorice runs on the Nihility path with Quantum damage. She's part debuffer, part damage dealer—not quite a full carry, but definitely not just a support either.
Here's the deal with her kit: she stacks something called "Temporal Fracture" on enemies. Get three stacks on a target, and boom—frozen solid. Her ultimate amplifies this by delaying everyone's turn, which sounds subtle until you realize it can prevent a boss from wiping your team right when you needed one more rotation.
The Temporal Fracture mechanic works like this: every time she hits with her skill, enemies get one stack. These last for two turns. Stack three of them, and the enemy gets frozen for a full turn. During that freeze, your whole team can smack them around while they can't do anything about it.
She needs 120 energy to charge her ultimate. That's a medium amount—not Seele-fast, but not Kafka-slow either. You'll get it up every three skill uses, give or take. This energy requirement actually shapes which teammates work best with her, since battery supports can get her cycling faster.
What sets her apart from other Nihility characters? Most of them exist to make your main damage dealer hit harder. Black Swan spreads DoTs. Pela strips defense. Silver Wolf implants weaknesses. Castorice does boost team damage, but she also deals her own damage AND controls when enemies actually get to move. It's a three-way split that makes her more flexible than characters locked into one job.
Author: Jordan Kessler;
Source: canelomobile.com
Castorice Skills Breakdown and Priority
Basic Attack: Quantum Severance Slaps one enemy for 50% of her ATK as Quantum damage. You'll rarely click this unless you're completely out of skill points or need to squeeze out two more energy before her ultimate. Last priority for leveling—honestly, level one works fine the entire game.
Skill: Fracture Point The bread and butter. Hits one enemy for 90% ATK, splashes adjacent targets for 45% ATK, both as Quantum damage. Applies one Temporal Fracture stack that hangs around for two turns. Three stacks = one frozen enemy for a turn. Costs one skill point per use.
This is where her rotation lives. The splash damage means she's surprisingly decent against grouped enemies, even though single-target scenarios show her real strength. One thing to watch: that three-stack freeze doesn't always line up perfectly with your damage windows. If you're at two stacks and the enemy's about to move, sometimes it's better to save the skill point rather than freeze them after they've already acted.
Ultimate: Chronos Collapse Blasts all enemies for 180% ATK. Any enemy with Temporal Fracture stacks gets their action delayed by 25% of wherever they currently sit on the turn order. The ultimate also strips all stacks but extends existing freezes by one turn.
The action delay scales with timing—hit enemies right before they move, and you get maximum value. Hit them right after they acted? Less impact. The AoE nature makes this ultimate shine in multi-target content, though even against single bosses, that 25% delay often means the difference between surviving and getting smacked.
Talent: Quantum Resonance Whenever anyone on your team hits a frozen enemy, Castorice launches a follow-up attack for 30% of her ATK. This procs once per ally action. Pair her with fast attackers, and this talent becomes a steady stream of extra damage.
Technique: Preemptive Strike Start every battle with one Temporal Fracture stack on all enemies. Saves you one skill rotation during setup. Occasionally enables turn-one freezes if you've built your team for it.
Level These Skills in This Order: Skill first, always. It's both your damage source and your utility button. Ultimate second for better scaling on that AoE blast and stronger delays. Talent third since the follow-up damage adds up over long fights. Basic attack dead last—or never. Seriously, save those materials.
Author: Jordan Kessler;
Source: canelomobile.com
Best Light Cones for Castorice
Light cone choice decides whether Castorice lands her debuffs consistently or whiffs them half the time. Some options push her damage. Others guarantee she actually freezes things. The best ones do both.
Light Cone Name
Rarity
Key Effect
Ranking
Eternal Vortex
5★
Boosts Quantum DMG 24% and Effect Hit Rate 18%. Debuff application grants 8% DEF ignore for 2 turns, stacks three times.
1st
In the Name of the World
5★
Adds 24% damage against debuffed enemies. Skill usage increases Effect Hit Rate 18% and ATK 24% for one turn.
2nd
Eyes of the Prey
4★
Grants 20% Effect Hit Rate and 24% DoT damage.
3rd
Good Night and Sleep Well
4★
Each debuff on target increases damage 12%, stacking three times maximum.
4th
Resolution Shines As Pearls of Sweat
4★
Adds 16% DEF. Once Effect Hit Rate hits 50%, increases damage 12%.
5th
Eternal Vortex is her signature, and yeah, it's her best option. The Effect Hit Rate means your debuffs actually stick. The Quantum damage bonus applies to everything—her skill, ultimate, even those follow-up attacks from her talent. The DEF ignore stacks make her hit noticeably harder against tanky enemies. If you're investing in Castorice long-term, this cone's worth the pull.
In the Name of the World competes closely if you snagged it from previous banners. Damage against debuffed enemies works great since she applies debuffs herself. Skill usage triggers an 18% Effect Hit Rate bump plus 24% ATK—perfect timing for her rotation. It's slightly behind Eternal Vortex because it lacks that permanent Quantum damage boost, but the gap isn't huge.
Eyes of the Prey becomes your go-to four-star if you've already built Effect Hit Rate through relics. The DoT damage bonus doesn't actually help her kit much (she's not a DoT character), which makes this weaker than it looks. But that 20% Effect Hit Rate compensates for mediocre relic substats, and sometimes hitting your debuffs matters more than squeezing out extra damage.
Good Night and Sleep Well scales with team composition. Run her with Pela and Silver Wolf, and suddenly enemies are carrying enough debuffs to max this cone's stacks constantly. The 36% damage boost at full stacks applies to everything she does, making it surprisingly consistent. Just needs the right teammates to unlock that potential.
Resolution Shines As Pearls of Sweat is the true F2P option from Herta's store. The DEF stat does nothing for Castorice. That 12% damage boost only needs 50% Effect Hit Rate to activate, which you'll hit through relics anyway. It works, but it's noticeably weaker than everything else on this list.
Common mistake? Grabbing a pure ATK light cone without Effect Hit Rate. Castorice hitting like a truck doesn't matter if her Temporal Fracture applications keep missing. The utility loss from failed debuffs tanks your team performance way harder than slightly lower damage numbers would.
Castorice Relics and Stat Priority Guide
Relic building for Castorice walks a tightrope. You need enough Effect Hit Rate to land debuffs. You want offensive stats for damage. Balancing both takes more thought than just stacking ATK and calling it done.
Recommended Relic Sets
Genius of Brilliant Stars (4-piece): Adds 10% Quantum damage baseline. Against enemies with Quantum weakness, ignore 10% DEF. No Quantum weakness? Still ignore 6% DEF. This set works everywhere. The DEF ignore multiplies with her signature light cone for chunky damage gains. Plus, that unconditional Quantum boost helps regardless of enemy lineup.
Prisoner in Deep Confinement (4-piece): Grants 12% ATK flat. Each DoT on enemies lets you ignore 6% of their DEF when dealing damage, maxing at three stacks. Strong choice if you're running Kafka or Black Swan alongside her. Without DoT teammates, this set loses most of its value. Very team-dependent.
Mixed Sets (2-2-2): Sometimes your best relics just don't come in matching sets. Genius of Brilliant Stars (2-piece) plus Space Sealing Station (2-piece) or Musketeer of Wild Wheat (2-piece) works fine. Better substats beat set bonuses if the difference is significant. Don't force a bad four-piece when mixing gives you way better stats.
Author: Jordan Kessler;
Source: canelomobile.com
Planar Ornaments:
Firmament Frontline: Glamoth: Provides 12% ATK. Hit 135 SPD total, and you get another 12% damage. Simple, effective, and the speed threshold isn't hard to reach with SPD boots.
Inert Salsotto: Adds 8% CRIT Rate baseline. Reach 50% CRIT Rate total, and you deal 15% more damage to debuffed enemies. Best option when you've managed to build CRIT stats without sacrificing Effect Hit Rate. Requires good relic luck though—hitting 50% CRIT Rate while maintaining enough Effect Hit Rate takes quality substats.
Main Stats and Substats
Relic Slot
Primary Stat
Alternative Stat
Body
CRIT Rate / CRIT DMG
ATK%
Feet
SPD
ATK%
Planar Sphere
Quantum DMG%
ATK%
Link Rope
ATK%
Energy Regeneration Rate
Body: Pick CRIT Rate if your substats haven't gotten you to 50% yet. Go CRIT DMG once you're above that threshold. ATK% works temporarily while you farm better pieces, but it caps your damage way lower than CRIT options.
Feet: SPD boots aren't optional. The extra actions mean more skills, more Temporal Fracture stacks, more ultimates. The action economy from speed demolishes what you'd gain from ATK% boots in basically every situation. Aim for 135 total SPD to trigger Glamoth's damage bonus.
Planar Sphere: Quantum DMG% is mandatory. Full stop. This elemental damage bonus multiplies with ATK scaling, making it way stronger than ATK% alternatives could ever be. No exceptions, no alternatives that work.
Link Rope: ATK% gives consistent damage. Energy Regeneration Rate helps if you're constantly sitting at 110/120 energy with your ultimate still on cooldown. Test your rotation in practice—if energy feels tight, swap to ERR. Otherwise, stick with ATK%.
Substat Priority: 1. Effect Hit Rate (stop at 67% total) 2. CRIT Rate (target 50-60%) 3. CRIT DMG 4. ATK% 5. SPD (until you hit breakpoints)
That 67% Effect Hit Rate target covers most enemies' base Effect RES. Going higher doesn't help much unless you're facing specific endgame content with elevated resistance. Balancing CRIT with Effect Hit Rate requires patience—resist the urge to sacrifice landing debuffs for marginally bigger damage numbers.
Best Team Compositions for Castorice
Castorice slots into several team types. She works in freeze-focused setups, hybrid damage compositions, even DoT teams. Her flexibility comes from providing personal damage plus utility, though she performs best when teammates can capitalize on frozen enemies.
Freeze Amplification Team: Castorice / Pela / Bronya / Fu Xuan
This comp maximizes freeze uptime through action manipulation. Pela shreds DEF and stacks extra debuffs (great for Good Night and Sleep Well users). Bronya's action advance lets Castorice take bonus turns, stacking Temporal Fracture faster and freezing more frequently. Fu Xuan keeps everyone alive while her follow-up attacks trigger Castorice's talent for extra damage.
The rotation flows naturally: Pela debuffs, Bronya advances Castorice, she stacks and freezes targets, then everyone capitalizes on that frozen window. This team falls apart against freeze-immune bosses but absolutely dominates content where crowd control functions normally.
Silver Wolf implants Quantum weakness so Castorice's Genius set bonus always activates fully. She also shreds DEF substantially. Seele carries as main DPS, benefiting from frozen enemies and Silver Wolf's debuffs. Luocha handles healing without eating skill points, letting Castorice and Seele stay aggressive.
This team frontloads damage hard. Silver Wolf implants weakness first rotation, Castorice freezes priority targets, Seele deletes them during the freeze window. You lack dedicated shielding, making positioning matter more, but Luocha's healing throughput handles most incoming damage comfortably.
Black Swan and Kafka create persistent DoT pressure while Castorice adds Quantum damage and crowd control. Her Prisoner set bonus fully activates here. Freezes buy time for DoT ticks to pile up. Huohuo provides healing, energy regeneration for faster ultimates, and ATK buffs for everyone.
Author: Jordan Kessler;
Source: canelomobile.com
This team excels in sustained fights where DoT damage compounds over multiple cycles. The freeze utility prevents dangerous enemy actions while DoTs drain health pools steadily. It's slower than pure burst compositions but remarkably consistent against tanky opponents who survive initial rotations.
For newer players without limited five-stars, this uses accessible four-star supports. Tingyun generates energy and buffs ATK. Asta provides SPD buffs and helps with fire weakness breaks. Natasha keeps everyone healed. Castorice becomes the primary damage dealer here, with supports amplifying her output.
This team won't set clear time records, but it handles story content and early Memory of Chaos floors without issues. Watch your skill point economy—Castorice eats skill points regularly, so Tingyun and Asta need to basic attack often to keep the balance positive.
Castorice's real value isn't just her damage numbers—it's the breathing room she creates. In tough content where a single enemy action spirals into a team wipe, her freezes and action delays buy you the turns needed to stabilize. She's insurance against bad RNG and positioning mistakes
— Prydwen Institute, HSR theorycrafting analysis
Castorice Eidolons Worth Pulling
Castorice's eidolons offer gradual improvements instead of massive power spikes. Most players should stop at E0 unless they're seriously committed to maxing her out or have resources to burn.
E1: Quantum Entanglement Applying Temporal Fracture regenerates 5 energy. This smooths her ultimate rotation significantly, reducing how much you need Energy Regeneration Rate from substats. It's a quality-of-life upgrade that frees up relic substat requirements. Worth considering if you're one copy from pity, but not worth chasing specifically.
E2: Cascading Collapse Ultimate's action delay gets an additional 10% potency. This extends crowd control windows and provides more safety margin in challenging encounters. The improvement's noticeable but not essential—her base ultimate already delays actions enough for most content.
E4: Temporal Mastery Adds 20% Effect Hit Rate and reduces freeze requirement from three Temporal Fracture stacks to two. This eidolon represents her biggest constellation power spike. Freezing enemies one turn earlier accelerates her utility dramatically. The Effect Hit Rate bonus frees up tons of substat requirements. If you're considering any eidolon past E1, this is your target.
E6: Infinite Recursion When her ultimate kills an enemy, she immediately takes another turn and regenerates 50 energy. This enables explosive clear speeds in content with multiple weak enemies but provides minimal value against single-boss encounters. It's a luxury upgrade that doesn't justify the resource investment for most players.
Investment Recommendation: E0 gives Castorice everything she needs to function effectively. E1 improves comfort. E4 significantly boosts her utility. E6 is for collectors or players using her as their primary carry across all content types. The gap between E0 and E4 is substantial, but the resource cost rarely justifies the improvement unless you're targeting top-percentile clear times or really love the character.
Frequently Asked Questions About Castorice
Is Castorice worth pulling in Honkai: Star Rail?
Castorice fills a specific niche as a Quantum Nihility character with crowd control. Pull her if you lack strong Quantum damage dealers, need better crowd control options for challenging content, or want to build freeze-focused team compositions. Skip her if you already have well-invested Quantum carries like Seele or Qingque and don't particularly value the freeze utility she brings. She's not mandatory for clearing any content, but she provides distinct advantages in specific scenarios that other characters can't replicate.
What is the best free-to-play light cone for Castorice?
Resolution Shines As Pearls of Sweat from the Herta Store is your most accessible option. While it's the weakest recommendation on the list, it functions adequately once you build 50% Effect Hit Rate through relics. Eyes of the Prey performs better if you've obtained it from previous battle pass seasons or pulled it from the standard banner. If you're willing to wait, Good Night and Sleep Well from future events might become available and would outperform Resolution.
Can Castorice work as a main DPS or sub-DPS?
Castorice works primarily as a sub-DPS with strong utility contributions. She deals respectable damage but lacks the multipliers and scaling to match dedicated hypercarries like Seele, Jingliu, or Dan Heng IL. Her optimal role involves applying debuffs, freezing enemies, and contributing follow-up damage while a primary carry handles the bulk of damage output. In budget teams lacking five-star carries, she can serve as a main DPS, though this approach limits her overall effectiveness compared to her sub-DPS role.
Which eidolon should I prioritize for Castorice?
E4 represents her most impactful constellation, reducing freeze requirements from three stacks down to two and adding 20% Effect Hit Rate. This accelerates her utility significantly and eases relic building requirements. However, the resource cost of reaching E4 rarely justifies the improvement for most players given how well she functions at E0. E1 provides a more reasonable stopping point, improving energy generation without requiring multiple copies. E0 remains perfectly viable for all content in the game.
What are the most important stats for Castorice?
Effect Hit Rate to 67% ensures consistent debuff application—this is non-negotiable. After reaching this threshold, balance CRIT Rate (targeting 50-60%), CRIT DMG, and ATK%. SPD should hit at least 135 to activate Glamoth's damage bonus and improve overall action economy. Quantum DMG% on your planar sphere is mandatory with no acceptable alternatives. Don't sacrifice Effect Hit Rate for damage stats—missed debuffs hurt your team performance more than slightly lower CRIT values would.
Who are the best support characters for Castorice?
Pela provides DEF shred and additional debuffs, amplifying Castorice's damage while enabling certain light cone effects. Silver Wolf implants Quantum weakness for consistent Genius set activation and applies substantial DEF reduction. Bronya advances actions, letting Castorice take extra turns for faster Temporal Fracture stacking and more frequent freezes. Fu Xuan offers survivability while triggering Castorice's talent with follow-up attacks. For accessible four-star options, Tingyun and Asta provide energy regeneration and ATK/SPD buffs respectively. Huohuo works excellently for energy-hungry teams needing healing plus buffs.
Building Castorice effectively means balancing damage output with debuff consistency. Max her skill first for leveling priority. Hit at least 67% Effect Hit Rate through your relics and light cone combined. Then invest in CRIT stats for damage scaling. Her signature light cone provides the cleanest optimization path, but four-star alternatives like Eyes of the Prey or Good Night and Sleep Well perform adequately when paired with appropriate team compositions.
Team building should emphasize either freeze synergy with characters like Pela and Bronya, or hybrid compositions pairing her with established carries like Seele. Her eidolons offer improvements but aren't necessary—E0 handles all content when built correctly with proper relics and team support.
The most common mistake? Treating Castorice like a traditional Nihility support and neglecting her damage potential. Build her with offensive stats while maintaining debuff consistency, and she'll contribute meaningful damage alongside her utility. The flip side's just as bad—overinvesting in pure damage at the expense of Effect Hit Rate compromises her core functionality and makes her feel inconsistent.
Castorice rewards players who understand action economy and debuff timing. She's not the flashiest character in the roster, but her combination of crowd control, personal damage, and team flexibility makes her valuable across multiple team archetypes and content types. Get the build right, and she'll earn her spot in your roster rotation.
Xilonen is one of Genshin Impact's most versatile Geo supports. This comprehensive guide covers optimal artifact sets, weapon choices, talent priorities, team compositions, and whether to build her as support or DPS, with detailed constellation breakdowns and expert tips
Master Windwalker Monk with this comprehensive BiS guide. Learn optimal stat priorities (Versatility > Crit > Mastery), acquire best-in-slot gear for each slot, understand tier set bonuses, execute the proper rotation, and configure essential WeakAuras for maximum DPS
Tingyun remains one of the most accessible and versatile support characters in Honkai: Star Rail. This guide covers her best light cones, optimal relic builds, team compositions, eidolon value, and advanced tips to maximize her ATK buffs and energy generation across all content
Syndra remains one of the most rewarding mages for players who master sphere manipulation. This comprehensive guide covers optimal rune configurations, core AP builds, essential combos, and matchup strategies that separate good Syndra players from great ones in 2026
The content on this website is provided for general informational and educational purposes only. It is intended to explain concepts related to video games, gaming guides, builds, mobile gaming, multiplayer strategies, and gaming history.
All information on this website, including articles, guides, and examples, is presented for general educational and entertainment purposes. Gameplay outcomes, strategies, and performance may vary depending on player skill, game updates, and platform.
This website does not provide professional advice or guarantee game outcomes, and the information presented should not be used as a substitute for official game documentation or developer guidance.
The website and its authors are not responsible for any errors or omissions, or for any outcomes resulting from decisions made based on the information provided on this website.