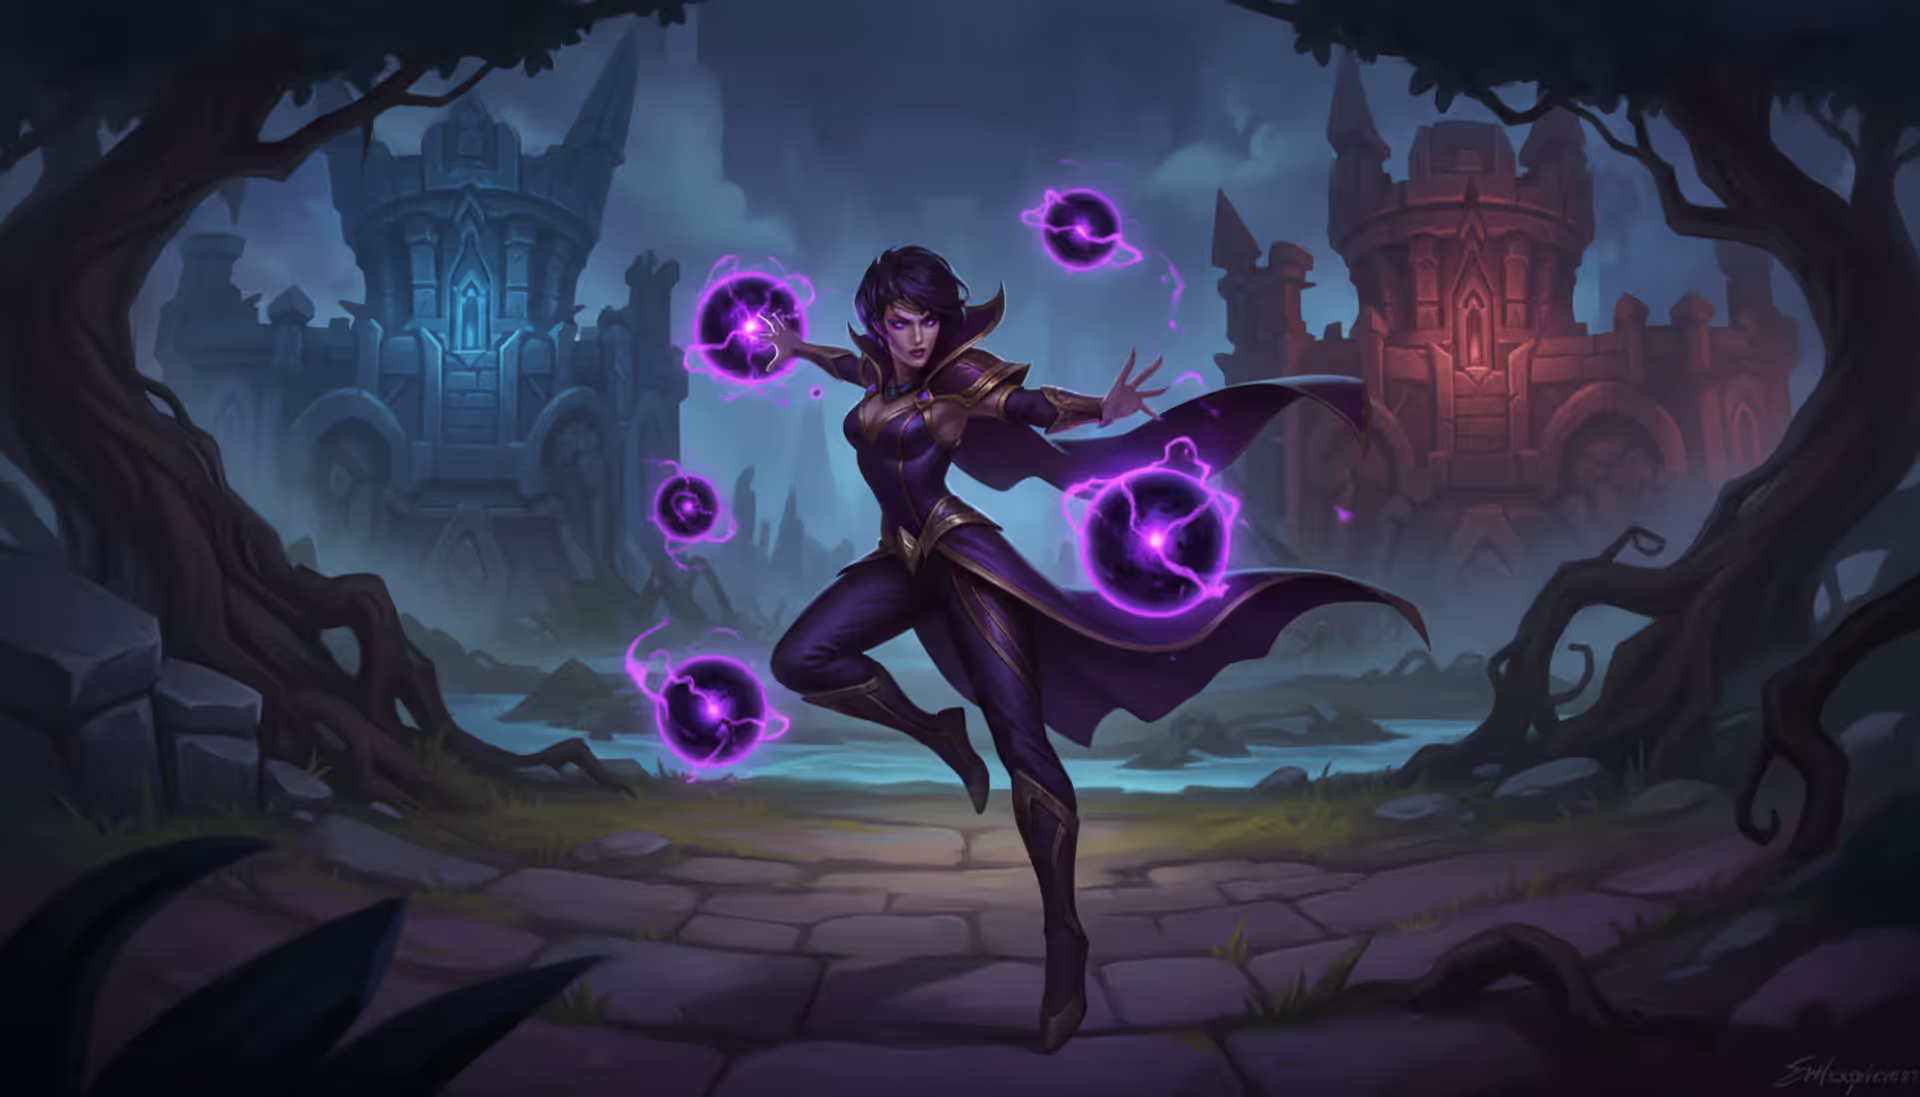
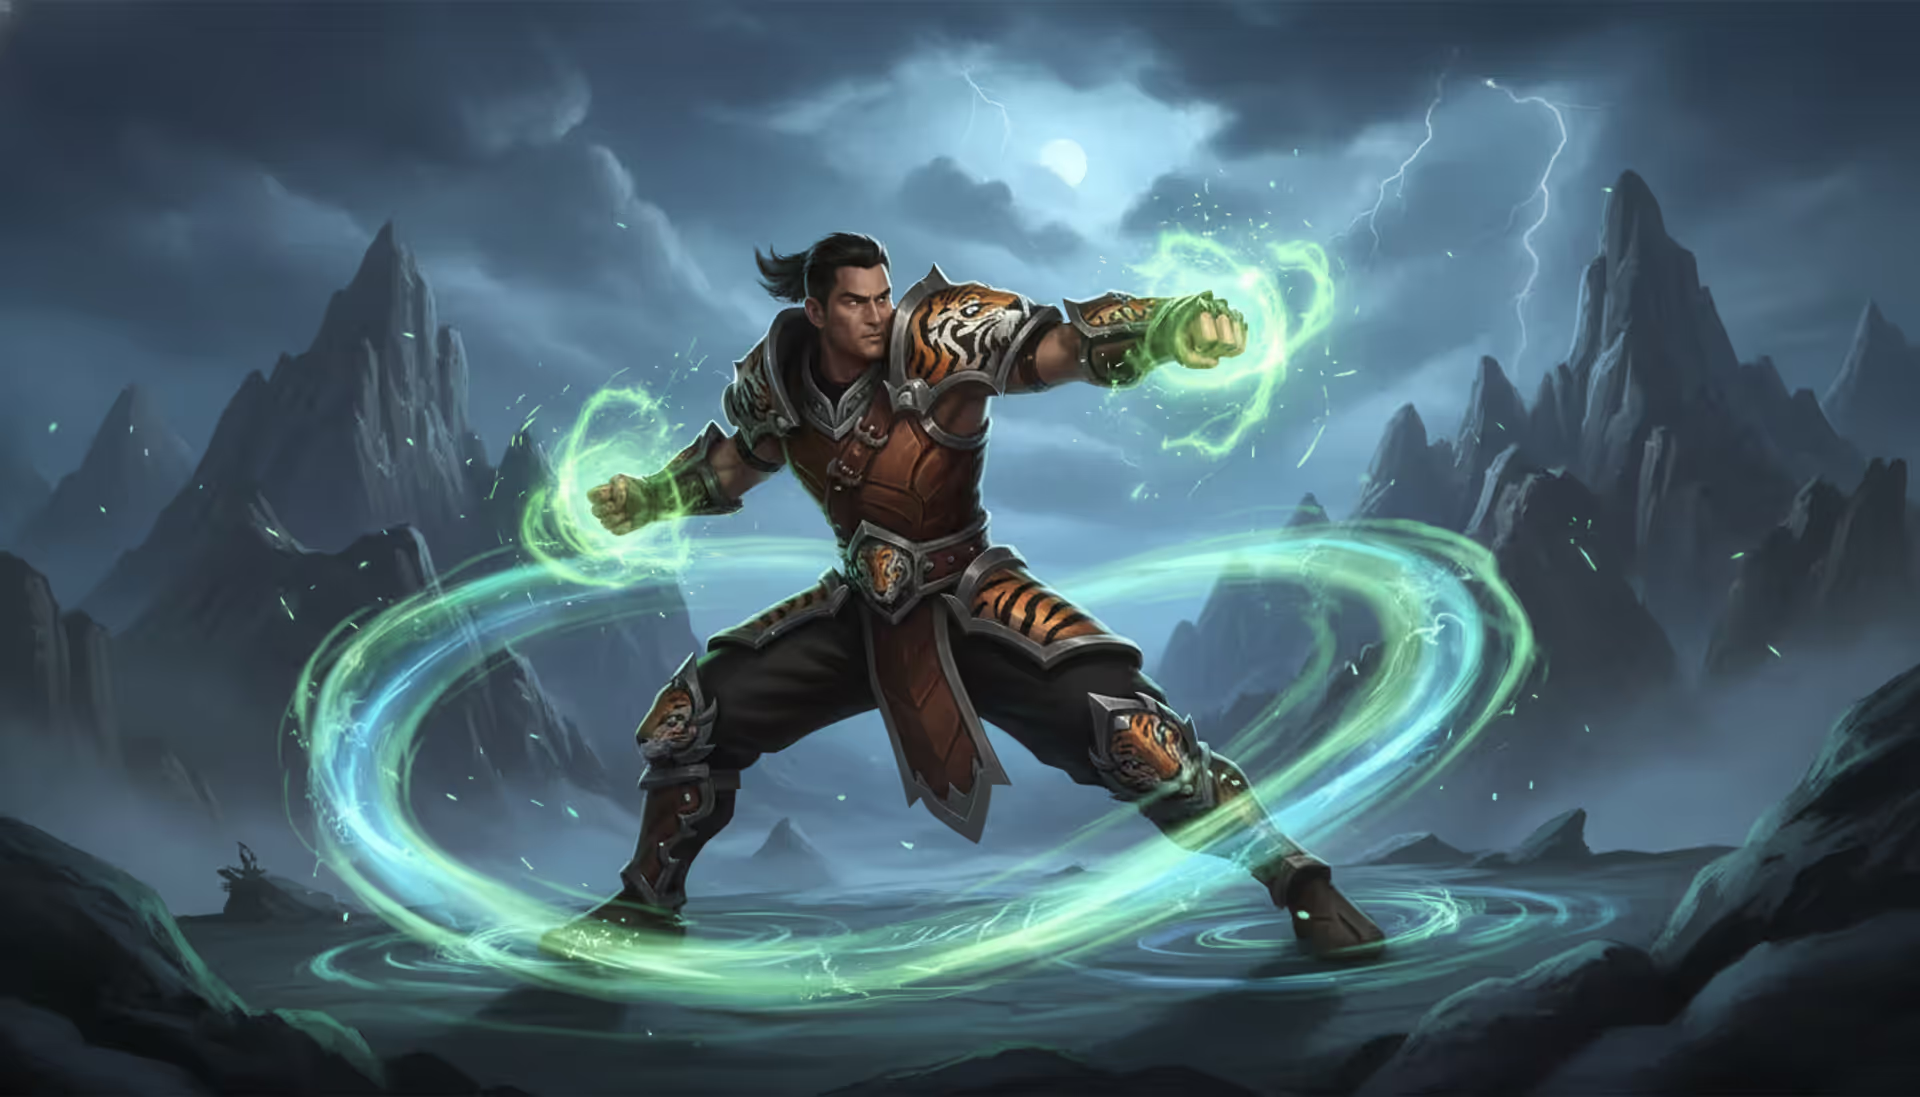
When you watch high-ELO Syndra mains operate, it's not flashy mechanics that stand out first—it's the confidence. They'll blind pick her into Yasuo, Fizz, champions that supposedly hard-counter her, and still come out ahead. The secret? Understanding that single delayed sphere placement that converts a dodgeable stun into guaranteed CC.
I've been running Syndra since Season 9 (yeah, during that horrible mini-rework everyone hated). After about 800 ranked games spread across three seasons, here's what surprised me most: she's way less complicated than streamers make her look, but positioning those spheres perfectly takes legitimate practice. One sphere placed 200 units differently completely changes whether you get the stun or whiff entirely.
This guide covers what actually works in 2026's current meta—the rune pages that make sense with today's durability updates, item builds that don't leave you broke after one death, and lane strategies I genuinely wish someone explained to me around game 400.
Core Syndra Runes and Stat Shards
Picking wrong runes on Syndra feels terrible because you're already managing mana problems and paper-thin defenses.
Primary Tree - Sorcery:
Take Electrocute over First Strike in basically every game. I know the gold generation looks appealing when you're theory-crafting builds, but let's do actual math. Electrocute triggers off Q-E, or even just Q-auto-E against melee matchups, dealing somewhere between 170-210 damage during those crucial levels 3-8. Land this 8-10 times before your first back (totally realistic), and you're accumulating around 1,500 damage that converts directly into kill pressure.
First Strike sounds great until you face Zed. Or Yasuo. Or literally any champion that engages onto you instead of the reverse. You waste the keystone entirely in matchups where you supposedly needed help scaling.
Manaflow Band fixes the energy problems without forcing you back every three waves. Six Q casts by level 4 drain roughly 300 mana. Skip Manaflow? You're either recalling constantly or buying Tear, which delays your actual power spikes by nearly 12 minutes.
Here's a mistake I made for probably 200 games: I'd waste Manaflow stacks poking their tank top laner. Hitting Sion with Q just to stack Manaflow accomplishes nothing except shoving your wave and inviting ganks. Save it. Wait for their mid laner to walk up for cannon minion, then Q them specifically.
Author: Megan Crosley;
Source: canelomobile.com
Thoughtful Precision (formerly Transcendence) comes online at level 8, perfectly timed for when first dragon fights start breaking out. That 20% cooldown refund on takedowns gets ridiculous during jungle skirmishes around scuttle—you're throwing spheres twice as frequently as opponents expect.
Scorch beats Gathering Storm unless your average game time exceeds 30 minutes. Actually check your match history. Season 2026 games typically close around 26-28 minutes because the durability nerfs made snowballing stick harder than previous seasons. Scorch contributes somewhere between 1,400-1,600 damage by minute 27. Storm needs 30+ minutes minimum just to break even. Grab Storm only when your entire composition scales hard—think Kayle top, your Syndra mid, Jinx ADC kind of draft.
Secondary Tree - Domination:
Taste of Blood heals 18 (+0.10 AP) per champion hit, 20-second cooldown. Sounds meaningless on paper. Adds up to roughly 380-450 health throughout laning phase, literally the health difference between surviving Ignite ticks at 270 HP versus dying.
Treasure Hunter speeds up your power spikes noticeably. Average kill participation around 50% nets approximately 550 gold by 19 minutes. That's basically half of Needlessly Large Rod, arriving two minutes earlier.
Stat Shards:
Double Adaptive Force, finish with flat Health. I know scaling health looks smarter mathematically. Doesn't matter when Talon level-2 dives you with Ignite while you're sitting at 580 HP instead of 645. That extra 65 health blocks early cheese kills during levels 2-6 when assassins hunt for first blood.
Understanding Syndra's Abilities and Combos
Ability Breakdown and Mechanics
Passive - Transcendent: Maxing each ability unlocks substantial upgrades. Max Q first? You get three bonus spheres for ultimate, translating to around 650+ extra damage minimum. Max W? Slow increases from 25% up to 80%, basically rooting targets. Max E? Width expands by 50%, converting near-misses into direct hits. Max R? Execute threshold activates at 15% health, securing kills through heals and shields.
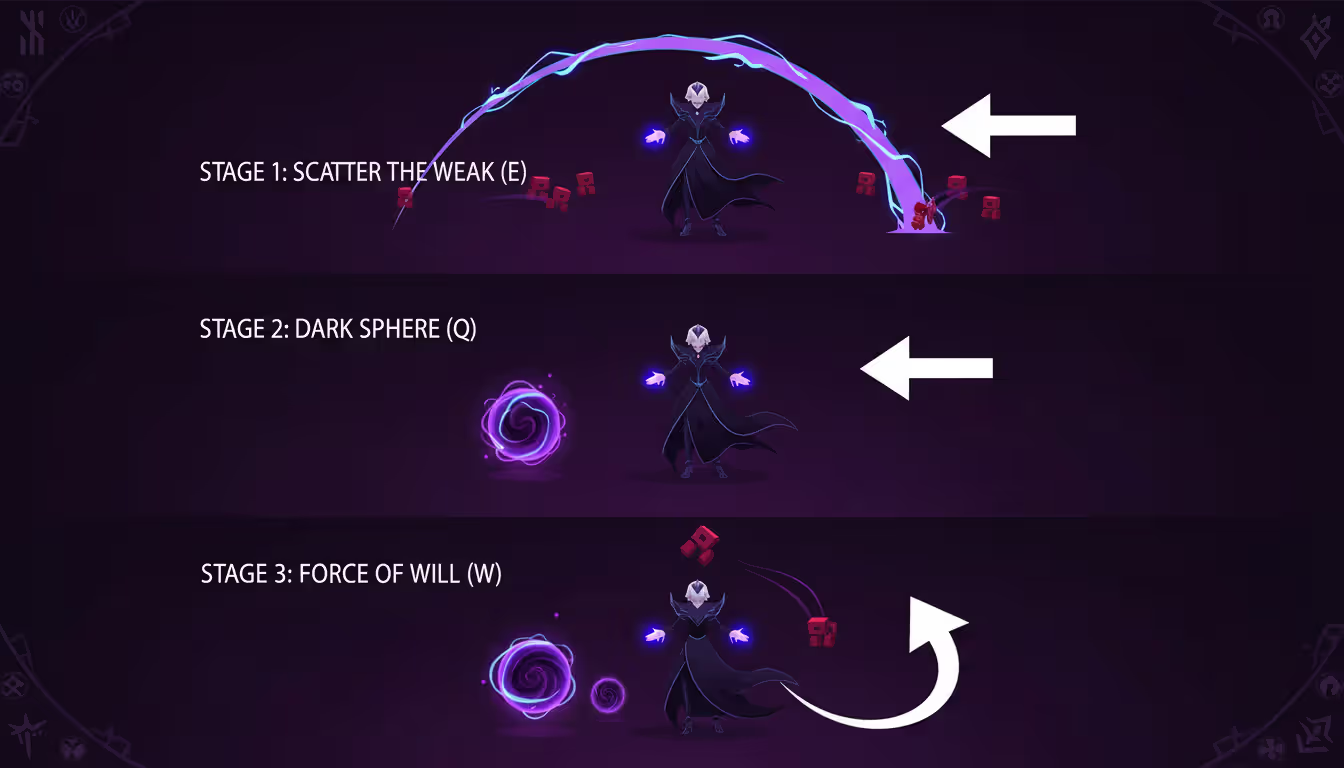
Q - Dark Sphere: Creates a sphere lasting 6.5 seconds. Here's what most players miss—damage applies on cast, not when the animation finishes visually. You can Q-auto and your auto connects before the sphere appears on screen. Sphere positioning matters way more than people realize. Placing spheres perpendicular to your target makes E stuns exponentially harder to sidestep because they'd need to dash sideways instead of backward.
W - Force of Will: Grabs spheres, minions, even jungle camps through walls (yes, really—steal Gromp from behind Blue buff wall). This resets your auto-attack animation, creating cancels. Don't just spam basic Q-W. Execute Q-auto-W(grab)-auto-W(throw)-auto instead. Three autos compared to one.
E - Scatter the Weak: 0.25-second cast time beats most players' actual reaction speed. They're predicting your stun, not reacting to it. Multiple sphere hits don't extend stun duration (stays 1.5 seconds), but damage absolutely stacks. Knocking three spheres into someone deals triple E damage plus each individual sphere's damage.
R - Unleashed Power: Fires every available sphere at one target. Three ground spheres plus maxed Q passive equals seven spheres minimum. At two-item spike? That's around 1,250 damage before resistances. Three items with Deathcap? Approximately 1,850 damage. Most squishies sit around 1,950 health at 28 minutes.
Essential Ability Combos for Maximum Damage
The Basic Stun: Cast Q, pause approximately one second (literally count "one-Mississippi" in your head), then E. That brief delay lets your sphere travel roughly 450 units forward before you knock it backward. Stun range extends from 700 up to 1,150 units. Instant Q-E only stuns enemies literally standing on existing spheres.
The Long-Range Engage: Drop Q, walk forward while it spawns, W to grab the sphere, reposition during pickup animation, throw W, E the slowed target. Total range reaches approximately 1,450 units. Against immobile mages like Xerath, Vel'Koz, Lux—this basically guarantees damage.
The Seven-Sphere Delete: Before objective fights, pre-place three Qs in triangle formation near pit. When someone facechecks, execute Q-W(grab sphere)-R-E. W slows them 80%, R deletes with six spheres, E stuns whatever's left. Total elapsed time: roughly 0.7 seconds, faster than Lulu can R their teammate. I've actually stolen Baron with this because enemy junglers think 45% HP is safe.
The Escape Combo: E first with zero spheres (just pure knockback), immediately Q your current position, W grab a minion and pull yourself backward. E creates 550 units separation, Q provides vision preventing brush jukes, W lets you hop certain walls near raptors or blue buff. Saved me from Nocturne R multiple times, which feels ironic considering his R supposedly counters immobile mages.
Author: Megan Crosley;
Source: canelomobile.com
Syndra Ability Sequence and Skill Order
Always start Q level 1. Every single game. Zero exceptions. You need ranged poke and safe CS tool.
At level 2, decide based on jungle matchup: grab E against early-game junglers like Elise, Lee Sin, Jarvan who might show up at 2:45. Otherwise take W at level 2 since Q-W-auto instantly procs Electrocute.
Standard Maxing Order: R > Q > E > W
Q max is completely non-negotiable. Zero exceptions exist whatsoever. Cooldown drops from 4.0 seconds down to 2.4 seconds, meaning you maintain three spheres permanently rather than scrambling. Base damage jumps from 90 up to 230—your poke transitions from annoying to genuinely oppressive.
E max second. Ten-second cooldown versus 18 means stun availability twice per teamfight. W max second only makes sense against five-tank compositions like Cho'Gath, Ornn, Sion, Tahm Kench, Mundo stacking—which literally never happens in real matchmaking.
How I Level Abilities:
Levels 1-3: Q-E-Q (or Q-W-Q into passive farm lanes)
Levels 4-9: Max Q, grab E points at 4 and 8
Levels 10-13: Max E completely
Levels 14-18: Finish W
One trick I picked up watching Korean Challenger VODs: if Zed's absolutely crushing you and you desperately need waveclear just to farm under tower safely, put a second W point at level 8. This lets you grab and execute caster minions faster. You'll delay E max by exactly one level, but you won't finish lane phase 0/4 either.
Best Items for Syndra's AP Build
Starter Items and Early Game Purchases
Doran's Ring + 2 Health Potions. Standard, reliable, works in roughly 85% of matchups. That 1.25 mana per minion kill synergizes perfectly with Q spam patterns.
Dark Seal start? Legitimately risky territory. You need minimum 6+ stacks just for it to match Doran's Ring value, requiring kills or assists. One death to enemy Graves at level 3 wastes 350 gold completely. Only buy Dark Seal first when duoing with a jungler who's guaranteed to path mid at 3:00.
First Back Shopping: 1,300 gold is your breakpoint. That buys Lost Chapter, permanently solving mana limitations. Forced back with only 900? Grab Amplifying Tome plus Control Ward. Got 1,900+ gold? Lost Chapter AND Sorcerer's Shoes—flat penetration increases damage by roughly 14% against base magic resist targets.
Core Item Path
Luden's Companion (renamed from Luden's Tempest in 2026's mythic rework) remains Syndra's best mythic choice. The Haste passive grants 5 ability haste per legendary item, eventually hitting 115+ AH. Echo damage procs on every single Q cast—you're generating 160-210 free damage per trade rotation. Finish this by 12 minutes when even in CS, or 14 minutes when slightly behind.
Sorcerer's Shoes by 15-minute mark. Flat magic penetration makes abilities deal true damage to squishies who haven't bought MR yet. Works out to approximately 13-16% more damage per ability cast.
Shadowflame second item capitalizes on Syndra's burst windows. The 10-20 magic penetration applies before percentage penetration, shredding through small shields. Since basically everyone runs Barrier or Shield Bash in Season 2026 (thanks balance team), this item pays for itself within two teamfights.
Rabadon's Deathcap third transforms you into legitimate threat territory. Luden's + Shadowflame + Deathcap pushes your Q to 570 damage on 2.4-second cooldown. Ultimate one-shots anyone below 2,250 HP. Enemy carries can't sidelane anymore because you'll collapse and delete them instantly.
Situational and Late Game Items
Zhonya's Hourglass slots in second when facing dive compositions—Nocturne, Camille, Irelia, Vi. Armor plus stasis saves your life, but delaying Shadowflame sacrifices kill pressure. Build second only when you're dying before dealing damage—check death recap, if 65%+ damage is physical, rush Zhonya's.
Void Staff replaces Shadowflame as fourth item when enemies stack MR. Once their mid and ADC reach 85+ magic resist, percentage penetration beats flat penetration. Exact breakpoint sits at 72 MR, so open scoreboard at 24 minutes and verify.
Banshee's Veil counters pick compositions perfectly. Spell shield blocks Ashe R, Thresh Q, enemy Syndra stuns. Position aggressively when it's active (literally walk into their jungle), then play cautious during 40-second cooldown window.
Mejai's Soulstealer upgrades your Dark Seal at 10 stacks. Don't force it though. Haven't reached 10 stacks by 18 minutes? Sell Dark Seal and move on. Fully stacked Mejai's (25 stacks) provides 145 AP for 1,600 gold—insane value proposition. But dying once loses 10 stacks and 350 gold worth of stats. Total boom-or-bust territory.
Item Name
Gold Cost
Primary Stats
Unique Passive
When To Buy
Luden's Companion
3,200g
90 AP, 600 Mana, 25 AH
Echo damage on ability hit
Always first—waveclear and burst combined
Shadowflame
3,000g
100 AP, 12 Magic Pen
Bonus 10 pen vs shields or low-HP targets
Second when ahead or versus enchanter supports
Rabadon's Deathcap
3,600g
120 AP
40% AP amplification
Third for massive damage spike
Void Staff
2,800g
90 AP
40% Magic Penetration
Fourth when enemies hit 80+ MR
Zhonya's Hourglass
3,250g
80 AP, 50 Armor
2.5s stasis, 120s CD
Second versus heavy physical dive
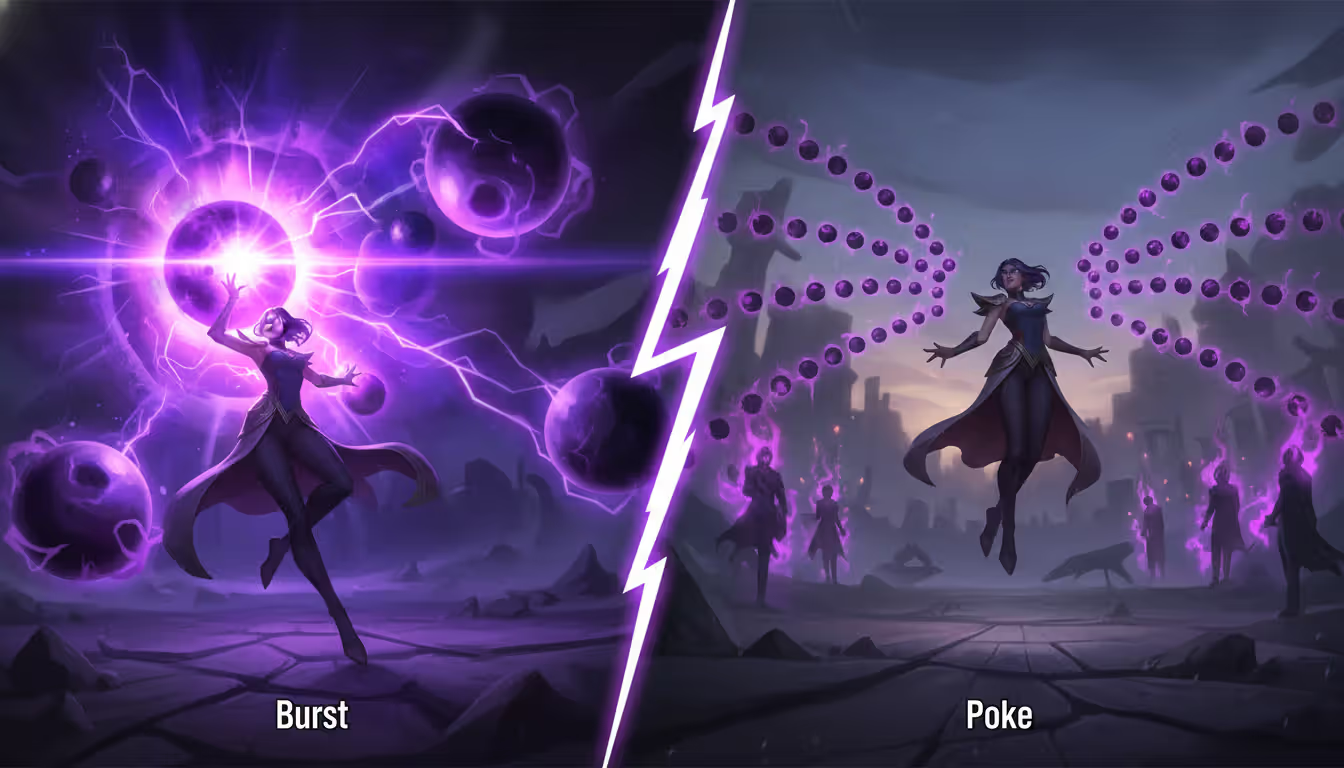
Syndra Poke Build vs Burst Build Comparison
Standard Syndra focuses on deleting one target every 55 seconds. Poke variants emphasize Q spam and sustained damage across 90-second sieges.
Burst Build (Standard Path):
Luden's → Shadowflame → Rabadon's → Void Staff. Maximizes ultimate damage and one-shot capability. You're hunting picks and waiting for those beautiful 5v5 teamfights where their ADC vanishes in under a second. Pair with Electrocute and focus on landing Q-E into full rotation.
Poke Build (Situational Path):
Liandry's Anguish → Rylai's Crystal Scepter → Shadowflame → Void Staff. Liandry's burns opponents over 4 seconds, dealing up to 12% max health as magic damage. Rylai's makes every Q slow by 30%, transforming you into a kiting machine enemies can't reach. Works best in poke compositions with Jayce, Xerath, Ezreal—drafts where you're sitting at inhibitor turrets for 90 seconds before anyone actually engages.
Rune swaps for poke: replace Electrocute with Arcane Comet. Comet has 10-second CD instead of 25, so you're proccing it 3-4 times during single siege rotations. Grab Scorch for additional burn damage stacking with Liandry's burn.
Real talk: poke build deals about 28% less burst during all-ins but roughly 55% more total damage in extended skirmishes lasting 30+ seconds. Use when your team lacks consistent DPS and has strong disengage like Janna, Karma, Lulu keeping everyone healthy. Avoid when your team desperately needs you assassinating priority targets—like when they have fed Jinx and nobody else can reach her.
Author: Megan Crosley;
Source: canelomobile.com
Syndra Matchup Tips by Lane Opponent
Favorable Matchups:
Twisted Fate: You outrange him by 225 units. Hang behind your caster minions so his Q can't poke without autopushing wave. When he wastes W to last-hit cannon minion, that's your window—he can't gold card you for 6 seconds. Q-E him every time W goes on cooldown. After level 6, either match his roams or collect three tower plates. Most TF players roam regardless, so spam-ping side lanes and take the gold trade.
Viktor: Abuse him before first-item upgrade. Your Q cooldown is shorter than his E, meaning you win trades mathematically. Stand outside his W range (700 units) and poke freely. Rush Sorcerer's Shoes to sidestep laser more easily. Once he finishes Hex Core upgrade, respect his waveclear and seek roam opportunities instead.
Orianna: Skill matchup favoring you during levels 3-5. Her ball has travel time; your Q casts instantly. When she uses Q-W to shove wave, immediately engage with Q-E while abilities are down. After 6, never clump with teammates during sieges—her ultimate punishes grouped positioning hard. Keep three spheres ready to interrupt her ball delivery with E knockback when she attempts R.
Author: Megan Crosley;
Source: canelomobile.com
Difficult Matchups:
Yasuo: Absolute nightmare territory. Wind Wall blocks Q, E, and R completely. Your stun becomes worthless since he dashes through minion waves constantly. Grab Bone Plating and Health shard. Let him push, farm safely under tower, spam ping for jungle assistance. After 6, you need to bait Wind Wall with fake E cast (press E then immediately Flash sideways), wait 4 seconds for wall expiration, then actually engage. Without that bait, killing him is basically impossible.
Fizz: Manageable until level 3, then genuinely oppressive. His E dodges your entire combo AND gap-closes simultaneously. Take Exhaust instead of Ignite—Exhaust cuts his all-in damage by 40%. Rush Seeker's Armguard (the 1,000g component) before finishing Luden's. When he Es toward you, immediately E him away. Even mid-air, your E knocks back his landing position. Never, ever press R until after his E is confirmed down.
Kassadin: You dominate levels 1-5, then slowly lose the game. Shove him under tower relentlessly, forcing him to use Q for CS instead of trades. Roam at level 6 to accelerate side lanes before he scales. By level 16, he out-damages and out-mobiles you completely. Games against Kassadin need closing before 29 minutes, or you've essentially lost.
Champion
How Hard
What Actually Works
Twisted Fate
Easy lane
Use your 225 range advantage, ping side lanes when he roams, grab plates
Viktor
Medium difficulty
Punish him pre-upgrade, buy early Sorcerer's, back off once he gets waveclear
Orianna
Medium difficulty
Trade when ball is on cooldown, stay spread in fights to dodge her ult
Yasuo
Extremely hard
Take Bone Plating, let him push to you, bait Wind Wall before committing
Fizz
Hard matchup
Buy early Seeker's Armguard, take Exhaust, E him away when he jumps
Kassadin
Hard matchup
Shove constantly pre-6, roam to side lanes, end before 30 minutes
Zed
Hard matchup
Save abilities for post-6, buy Zhonya's second, watch his shadow placement
LeBlanc
Medium-hard
You can't match roams, just farm and ping teammates constantly
Positioning Guidelines:
During laning phase, stand about 825 units from your tower. This distance allows safe retreat if ganked while not sacrificing CS opportunities. Against assassins, hang back around 1,050 units and accept missing some farm—being down 12 CS beats giving 300 gold plus shutdown bounty.
In teamfights, position at maximum Q range which is 800 units. You're not Cassiopeia or Azir who DPS from close range. You're a burst mage needing one clean angle on priority targets. Let frontline engage first, pause 2 seconds for enemies burning mobility spells, then Q-E their backline. Can't reach carries? Delete frontline instead—dead Ornn can't peel for their ADC anyway.
Roaming Versus Farming:
Roam when enemy mid shoves you in and recalls. You'll lose 1-2 waves (about 215 gold), but successful roams accelerate bot lane and secure dragon control. Skip roaming if your tower sits below 55% HP—they'll take plates worth 320 gold while you're walking bot.
Farm when side lanes are already winning. Accelerating your three-item spike matters more than helping a 3/0 Darius secure another kill. Exception: always roam top if their top laner is pushing without vision. Top laners never expect mid roams in 2026 because most mid laners simply don't roam top anymore.
What separates good Syndra players from great ones in 2026? Pre-positioning spheres before fights even start. You're not reacting to enemies—you're forcing them to react to your sphere placement. The mindset shift from reactive to proactive completely changes her effectiveness. Master that concept of controlling space with pre-placed spheres, and climbing becomes significantly easier
— Sarah Mitchell
Frequently Asked Questions About Syndra
What's the best starting item for Syndra?
Doran's Ring with 2 Health Potions covers roughly 88% of matchups. That mana restoration per minion kill lets you Q on cooldown without running out of mana. Dark Seal only works when you're extremely confident in getting early kills—you need minimum 6+ stacks to match value, and dying early wastes 350 gold completely. Against oppressive poke matchups like Xerath or Vel'Koz, Corrupting Potion provides enough sustain to survive laning phase, though you'll sacrifice some early AP.
Should I max Q or W first?
Always max Q first. Zero exceptions or situational adjustments exist. Cooldown drops from 4.0 seconds down to 2.4 seconds, literally doubling your damage output over time. W max provides 60 extra damage per cast but doesn't reduce cooldown whatsoever, meaning you're trading consistent DPS for minuscule burst increase. Even in unwinnable matchups where you desperately need waveclear, just put one extra W point at level 8 to grab cannons faster—don't max it fully.
How do I land Syndra's stun combo consistently?
Cast Q first, pause for half a second while it spawns and travels forward, then cast E. This timing creates a stun reaching approximately 1,150 range instead of just 700. Instant Q-E only stuns targets already standing on spheres. Practice the timing in practice tool for 10 minutes—set up target dummy and drill it repeatedly until it becomes muscle memory. Against mobile champions, Q where they're moving to, not where they currently stand. Yasuo dashing forward? Q behind him and E when he lands. The sphere will be perfectly positioned for stun.
What champions counter Syndra hardest?
Yasuo, Fizz, and Kassadin represent your worst possible matchups. Yasuo's Wind Wall negates everything, Fizz dodges your whole combo with E, and Kassadin outscales you by level 11. Secondary counters include Zed (excessive mobility plus kill pressure), LeBlanc (you can't match her roams), and Diana (survives your burst then all-ins you at 6). Into these matchups, take defensive summoners like Exhaust or Barrier, rush Seeker's Armguard early, and focus on farming rather than fighting.
Is Syndra good for climbing ranked?
Syndra rewards mechanical skill and game knowledge heavily, making her excellent for climbing if you're willing to invest 35-50 games minimum learning her. She punishes enemies for positioning mistakes and scales reasonably into late game. However, she's got a steep learning curve—expect 25-35 games before sphere placement and combo execution feel natural. Below Platinum, simpler champions like Annie or Malzahar climb faster because they're more forgiving of mistakes. Above Platinum, Syndra's skill ceiling lets you hard-carry games through pure mechanics alone.
When should I use Syndra's ultimate?
Fire R when you have minimum 5 spheres available (3 on ground + 2 base from R). Against squishies, 5 spheres deals around 1,050+ damage at two items—enough to kill through Barrier. Never ultimate a full-health tank unless it secures guaranteed kill; save it for their carries. In teamfights, wait for enemies using defensive spells like Zhonya's, Lulu R, or shields before pressing R. When you're ahead with 7 spheres ready, you can execute anyone below 58% health—that's around 1,350 HP at 26 minutes.
Learning Syndra takes time investment, but the payoff is genuinely substantial. She's one of those champions where you can actually feel yourself improving every 12-15 games. The core build path of Luden's → Shadowflame → Rabadon's provides consistent burst damage, while the poke variant with Liandry's suits extended sieges better. Your rune setup with Electrocute, Manaflow Band, and Thoughtful Precision covers laning phase and scales into teamfights effectively.
Drill that Q-E stun timing until it becomes pure muscle memory. Position safely in teamfights and wait for perfect angles to delete priority targets. Respect difficult matchups like Yasuo and Fizz by adjusting items and playstyle accordingly. After 50+ games, Syndra becomes incredibly rewarding—you'll start recognizing sphere angles and combo opportunities that other players simply can't see. That's when she really clicks and climbing accelerates naturally.
Xilonen is one of Genshin Impact's most versatile Geo supports. This comprehensive guide covers optimal artifact sets, weapon choices, talent priorities, team compositions, and whether to build her as support or DPS, with detailed constellation breakdowns and expert tips
Master Windwalker Monk with this comprehensive BiS guide. Learn optimal stat priorities (Versatility > Crit > Mastery), acquire best-in-slot gear for each slot, understand tier set bonuses, execute the proper rotation, and configure essential WeakAuras for maximum DPS
Tingyun remains one of the most accessible and versatile support characters in Honkai: Star Rail. This guide covers her best light cones, optimal relic builds, team compositions, eidolon value, and advanced tips to maximize her ATK buffs and energy generation across all content
Sona support excels through scaling, aura management, and positioning. Learn the best runes, item builds, ability sequence, lane strategies, and ADC synergies to dominate bot lane and teamfights
The content on this website is provided for general informational and educational purposes only. It is intended to explain concepts related to video games, gaming guides, builds, mobile gaming, multiplayer strategies, and gaming history.
All information on this website, including articles, guides, and examples, is presented for general educational and entertainment purposes. Gameplay outcomes, strategies, and performance may vary depending on player skill, game updates, and platform.
This website does not provide professional advice or guarantee game outcomes, and the information presented should not be used as a substitute for official game documentation or developer guidance.
The website and its authors are not responsible for any errors or omissions, or for any outcomes resulting from decisions made based on the information provided on this website.