The Skarner rework hit different. What used to be a walking meme about Dominion is now a legitimate jungle threat that can single-handedly drag enemy carries into oblivion. His suppression still defines his identity, but the reworked abilities finally gave him the tools to actually reach targets without getting kited into next week.
If you've been sleeping on Skarner, it's time to wake up. He's not some S-tier pick that everyone's banning, which honestly makes him perfect for climbing. People forget what he does, walk too far forward, and suddenly they're taking a forced tour of your fountain.
Understanding Skarner's Reworked Abilities
Here's what actually changed. Threads of Vibration (his passive) turns him into a wall-hugger—literally. Get close to any terrain and you'll zoom around with bonus movement speed. Better yet, every time you stun or suppress someone, all your basic abilities come off cooldown faster. In practice? Land your stuff and you'll have it up again before the enemy expects it.
Q - Shattered Earth / Upheaval throws most people off because it's actually two abilities smashed together. First activation: ground slam that hurts and slows. Second activation within a few seconds: everyone still in the zone gets yanked to the center and stunned. The trick? Don't recast immediately. Let them see the circle, watch them try to walk out, then yank them back in. During ganks, that first slow burns their flash. When they realize they're still in trouble and commit to fighting, that's when you stun them.
W - Seismic Bastion is straightforward—big shield that scales off your max HP, bonus resistances while it's up. But here's the part people miss: that shield detonates either automatically after a few seconds or when you reactivate it, dealing damage based on how much shield HP is left. Fighting a Lee Sin? Let him Q to you, pop the shield right as he flies in with his second Q, then detonate it in his face. You'll absorb his combo and slap him back simultaneously.
E - Ixtal's Impact determines whether you win or lose every 1v1. It's a skillshot that goes through minions but stops on the first champion. When you land it, that enemy gets marked, and your next three autos against them hurt way more plus refund your E cooldown. Miss this ability and you're basically a melee minion with a shield. Land it and you'll stick to targets like glue while your passive keeps proccing from the mark applications.
R - Impale stayed mostly the same—grab someone and drag them around—but they added one critical change. You can now reactivate it to throw your victim in whatever direction you want. Grabbed their ADC? Toss them into your team. Need to peel for your own ADC? Throw the enemy Zed away from them. The cast range got slightly buffed too, which doesn't sound like much until you're grabbing people who thought they were safe.
Author: Tyler Vance;
Source: canelomobile.com
Everything connects. Land E, auto three times to reduce cooldowns, drop Q under them, wait for the optimal stun timing, pop W to survive their retaliation. Your passive keeps everything rotating faster when you're near jungle walls, which is basically everywhere that matters.
Best Runes and Summoner Spells for Skarner
Primary: Resolve
Aftershock just makes sense. You're going to be landing hard CC constantly—might as well get free resistances every time you do it. The moment you suppress someone with R or stun them with Q, you become temporarily unkillable. That explosion damage at the end? Extra burst when you're diving backlines.
Demolish solves Skarner's one weakness: he doesn't naturally melt towers. Successful gank? Cool, now delete that turret plating in three autos. By 20 minutes you'll have earned an extra 600+ gold just from this rune.
Conditioning doesn't do anything until 12 minutes in, but who cares? You're farming efficiently anyway, and when it kicks in, you get permanent resistances that scale better than the early alternatives. The breakpoint where Conditioning outvalues Bone Plating is around 15 minutes—right when teamfights start mattering.
Unflinching stacks with your Legend: Tenacity (more on that in a second) to give you absurd tenacity. We're talking 40-50% CC reduction when you've got both fully stacked. Know what that means? You walk through Morgana bindings. Ashe slows barely touch you. Flash-R into five enemies and you'll still drag your target out before they can layer enough CC to stop you.
Secondary: Precision
Triumph has saved me more times than I can count. That healing procs in the middle of chaotic fights and suddenly you're surviving with 47 HP instead of dying. Plus the 20g per takedown adds up—you're basically getting a free component by mid-game.
Legend: Tenacity because tenacity stacking is borderline broken on Skarner. Stack this with Unflinching and Mercury Treads against CC-heavy comps and you'll understand why people permaban Morgana—except you'll be the Morgana, just ignoring their crowd control.
Some situations call for different setups. Phase Rush with Sorcery primary sounds weird but works against compositions built entirely around kiting. Proc it with E plus two autos and you'll run down Ezreal, Zeri, or anyone else who thinks they can escape. Predator with Domination primary gives you unmatched gank setup if your laners have CC but can't engage themselves. You sacrifice teamfight tankiness for early game impact, so only run this if you're confident you can snowball before 20 minutes.
Summoner spells aren't complicated. Flash + Smite. That's it. Flash-R wins games. Ghost seems tempting since you want to run people down, but your E and passive already do that. What you can't do naturally is get over walls or instantly gap-close 400 units—that's what Flash is for.
Skarner Jungle Route and Clear Strategy
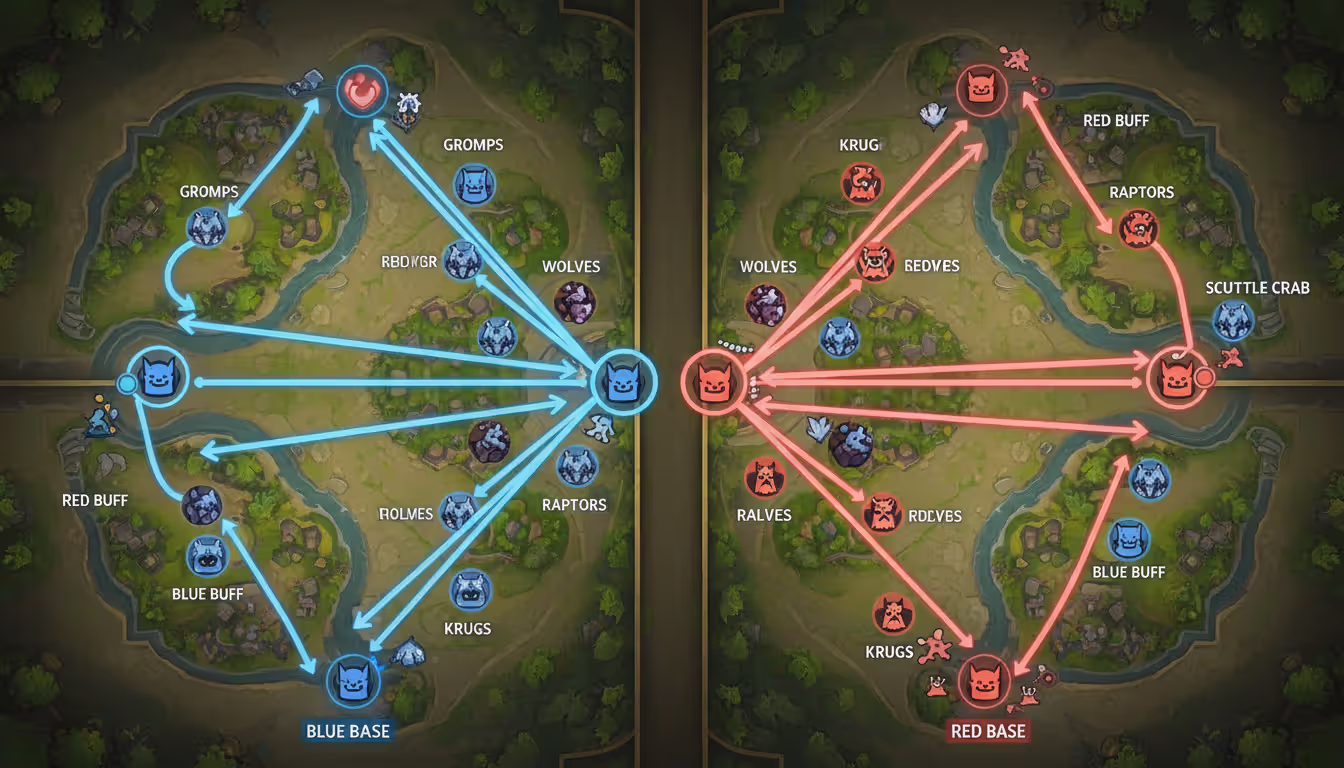
Standard First Clear: Red → Krugs → Raptors → Wolves → Blue → Gromp → Scuttle
Start Q, grab W at level 2, take E at level 3. You'll hit level 4 around 3:15 with enough HP to fight over scuttle if needed. The clear itself is smooth—Q reactivation groups up Krugs and Raptors so your AoE damage actually matters. W shield prevents Raptors from shredding you. Save Smite for Krugs or Gromp because the healing matters more than the 10 seconds you save on Raptors.
When you reach scuttle, evaluate: did enemy jungler show opposite side? Take both. Are they coming to contest? Can you land E on them? Do your laners have priority and can rotate first? Skarner loses early 1v1s against actual duelists. You're not beating Warwick or Trundle without setup, so don't ego-contest unless you have advantages.
Vertical Jungle Route (When Ahead)
Once you've got vision control and the enemy jungler is weaker than you, just take everything. Clear your camps, then walk into their jungle and take theirs too. Skarner's healthy clear and Q AoE let him power-farm both jungles simultaneously. The enemy jungler falls further behind, you maintain a level lead, everyone on your team benefits from the map pressure.
Author: Tyler Vance;
Source: canelomobile.com
Gank Timing
Level 3 ganks work if your laner has CC or the enemy is past river with no flash. E-auto-auto-Q creates enough lockdown for your laner to follow up with damage. It's not a guaranteed kill but it forces summoners or chunks them low enough that your laner wins the lane from there.
Post-6 changes everything. Your gank success rate goes from 40% to 90% because R guarantees kills on immobile targets without escape tools. Watch for overextended lanes at 3:30 (after first clear), 6:00 (after second rotation), and whenever R is up. ADCs shoving for plates, mid laners perma-pushing for priority—these players are basically asking to meet you.
Counter-Jungling
Your E and W make escapes pretty reliable if you get caught. Steal Raptors or Krugs from aggressive junglers who are constantly ganking lanes. Drop a ward at their jungle entrance, take camps, use your wall-movement speed to escape through unconventional paths that they won't predict.
You become unkillable, constant teamfight presence, reliable frontline no matter how behind
Way more damage, wins duels against carries, takes objectives faster
Weaknesses
Damage is mediocre, your team needs to follow up, can't solo carry if they're inting
Squishier than standard tank build, burst damage can delete you, positioning mistakes hurt more
Best Scenarios
Your team already has damage threats, enemy has dive champions, fights last 15+ seconds
Team lacks damage, you need sidelane pressure, fights are quick skirmishes
Tank Build Path
Hollow Radiance first item every single game unless something truly bizarre is happening. You get health, ability haste, and the Immolate passive that speeds up your clear. The bonus damage to monsters means you're out-farming most junglers while the burn damage adds up in extended fights. By "adds up" I mean 2,000+ damage by the end of a 35-second teamfight.
Plated Steelcaps against auto-attack junglers and ADC-heavy comps (Kindred, Graves, any team with two marksmen). Mercury's Treads against heavy AP or CC comps. If they have three AP champions or you're getting chain-CC'd, Mercs will save your life multiple times per game.
Sunfire Aegis second amplifies your Immolate damage and gives bonus resistances for each legendary item you complete. The burn damage ramps up the longer you're in combat, which synergizes perfectly with your tankiness. After 6 seconds in a fight, you're dealing legitimate damage just by existing near enemies.
Thornmail third against any composition with healing. Aatrox, Sylas, enchanters shielding their ADC—doesn't matter, your Thornmail applies Grievous Wounds automatically while you're fighting. The armor scales with your W resistances too.
Force of Nature or Randuin's Omen for your fourth item. Force against AP-heavy teams (plus the movement speed stacks with your passive for absurd zooming around the map). Randuin's against crit-based ADCs or when you need the active slow for extra peel.
Sixth item depends on game state. Warmog's Armor for infinite sustain during extended sieges—back off for 6 seconds and you're full HP again. Gargoyle Stoneplate when you need maximum survivability during R engages into five enemies. Abyssal Mask if your team has multiple AP champions who can abuse the magic resist shred you apply.
Bruiser and Hybrid Options
Iceborn Gauntlet replaces Sunfire when you need more CC and damage. The Spellblade proc adds burst to your E-auto combo, dealing an extra 200+ damage every few seconds. The slow field it creates helps you peel for carries or run down fleeing targets who think they're safe.
Sterak's Gage third item gives you a massive shield when you dive backlines. The bonus AD actually scales decently with your E mark damage—we're talking an extra 50 AD, which translates to 150+ damage across three marked autos. The tenacity stacks with your runes, pushing you over 50% CC reduction.
Black Cleaver makes sense if your team is running three or four physical damage dealers. You apply full armor shred in about 2 seconds with E-marked autos, and suddenly your ADC is dealing 30% more damage to their frontline.
Titanic Hydra converts health into damage (which you're stacking anyway) and improves clear speed noticeably. The active resets your auto timer, so you can E-auto-Titanic-auto for instant two-stack application.
Don't build full damage. Trinity Force Skarner or Divine Sunderer Skarner sound fun until you realize you die in 1.5 seconds and provide zero value. A dead Skarner suppresses nobody.
How Skarner's Crowd Control Works in Team Fights
Your CC works for both engage and peel, but you need to read the situation correctly or you'll waste R on their Sion while their Katarina pentakills your team.
Engage Scenarios
When your team needs you to start fights, Flash-R their highest-value squishy. Ideally this is their ADC or whichever solo laner is 7/0. Suppress them, drag them into your team, then reactivate R to throw them even deeper into your damage dealers. Immediately Q behind you to stun anyone trying to peel, then W to absorb the inevitable retaliation.
The suppression lasts 1.75 seconds. That's enough time for your team to 100-0 the target if they're paying attention. Ping your target before you Flash-R so your carries aren't caught off guard wondering who to hit.
Peel Scenarios
Author: Tyler Vance;
Source: canelomobile.com
When Zed or Kha'Zix or any assassin dives your backline, save R and Q. Let them commit their gap-closer to your ADC, then suppress and drag them away. Q stun creates a zone that prevents the rest of their team from following up. Your W shield absorbs their burst combo, often turning what should've been a 1v1 kill into a won trade for your carry.
The decision: does your team have engage without you? If your top laner is Malphite or your support is Nautilus, you can peel. If nobody else can start fights, you have to create them even if it means your ADC is vulnerable.
R can't be interrupted by most CC, but Quicksilver Sash and Mikael's Blessing cleanse it instantly. Track enemy inventories. If their ADC rushed QSS, target someone else or bait the cleanse with Q stun first, then use R after they've blown it.
During suppression you can still move. Use this. Drag targets out of their team's ability range. Pull them into terrain that blocks escape paths. River fights near baron pit let you drag targets up or down elevation changes, completely disorienting their team's formation.
Crowd Control Chaining
Optimal combo for maximum CC duration: E (mark target) → auto → auto → Q initial cast (slow) → auto (E cooldown reduced from passive) → wait half a second for enemies to cluster → Q reactivate (stun) → R (suppress priority target). This sequence maximizes crowd control time while reducing your cooldowns through passive procs.
Against mobile champions, reverse it. Use Q slow first to force their dash or blink, then E while they're locked in an animation. Yasuo, Irelia, Fiora—they all have predictable movement patterns you can exploit once you learn them.
Skarner Matchup Guide: Jungle and Team Compositions
Favorable Matchups
Karthus farms passively and has literally zero mobility. Invade his jungle post-6, suppress him during fights before he can ult, deny his scaling. Drop wards at his jungle entrances and steal camps whenever R is available. He can't contest you.
Evelynn gets hard-countered by your E revealing her briefly when it lands, plus your R suppression locks her down through her W charm. Rush an early Oracle Lens and sweep bushes during objectives. She can't assassinate your carries if you're bodyguarding them with R available.
Zac telegraphs his engage so obviously you'll have time to make coffee before he lands. Hold R for when he lands on your backline, then suppress and drag him away. Your W shield negates his entire burst combo, turning his engage into a suicide mission.
Author: Tyler Vance;
Source: canelomobile.com
Difficult Matchups
Graves beats you at every stage of the game. His E dash dodges your E skillshot, his armor scaling reduces your damage output, his burst combo chunks you harder than you chunk him. Don't 1v1 him. Gank lanes he isn't near, focus on outvaluing him through superior ganks, build Randuin's Omen to reduce his crit damage.
Nidalee clears faster and moves more, making it impossible to catch her. She'll invade your jungle early, take camps, and disappear before you can respond. Ward defensively, vertical jungle when she shows opposite side, focus on counterganking rather than matching her tempo. You outscale at 25 minutes if you survive to get there.
Kindred kites you forever with their range, and their R negates your assassination attempts. They'll constantly invade for marks. Contest marks with your laners helping—don't 1v1 them. Save R for after their ultimate expires, because suppressing someone inside Lamb's Respite achieves nothing.
Team Composition Synergies
Skarner thrives in wombo-combo comps. Pair him with Orianna (R them into Shockwave), Miss Fortune (R setup for Bullet Time), or Yasuo (Q knock-up enables Last Breath). Your suppression guarantees these abilities land on priority targets who can't dodge.
He struggles in poke-heavy comps that avoid teamfights. If your team locked Xerath, Ezreal, and Jayce, you lack follow-up for engages. Adapt by building bruiser items (Iceborn, Sterak's) to split-push and create sidelane pressure instead of forcing bad 5v5s.
Common Mistakes and How to Avoid Them
Ulting the Tank
New players suppress whoever they see first, which is usually the enemy tank. You just wasted your 100-second cooldown dragging Ornn into your team while their Jinx killed everyone. Before engaging, identify which enemy champion's death wins the fight. It's almost always the ADC or fed carry. If you can't reach them safely, wait for a better angle instead of forcing a worthless engage.
Mismanaging Q Timing
Reactivate Q too early and they walk out before the stun. Too late and they've escaped entirely. Sweet spot: cast initial Q when enemies are slowed (from your Q or ally CC), wait exactly half a second, then reactivate. They have minimal time to escape while remaining in range.
Building Full Tank When Behind
Counterintuitive but true: when you're 0/4, sometimes you need damage items to stay relevant. A useless Skarner with full tank provides one suppression every 100 seconds then dies. That same Skarner with Iceborn and Sterak's can duel enemy carries in sidelanes, creating map pressure that lets your team farm safely and scale. Evaluate whether your team needs a punching bag or an actual threat.
Ignoring Wave Management
After successful ganks, most players immediately return to jungle. Wrong. Help your laner shove the wave into enemy tower. This denies them gold and XP while giving your laner a safe recall. Those 15 seconds spent auto-attacking minions translate to a 300+ gold advantage that compounds throughout the game.
Forcing Fights Without Ultimate
Skarner's teamfight impact drops 80% without R available. Don't contest dragons or barons when it's on cooldown unless you have massive numbers advantage. Farm, set up vision, wait for your win condition to come back up. Patience wins more games than forcing.
Skarner's power budget shifted from passive crystal control to active playmaking. He's no longer about map control—he's about finding the one moment that wins the fight, then executing it perfectly
— Virkayu
FAQ
Is Skarner better as a tank or bruiser after the rework?
Tank provides consistent value regardless of how the game goes. You're useful when ahead, behind, or even. Bruiser offers higher carry potential but demands better mechanics and decision-making. For climbing ranked, tank Skarner forgives mistakes better. Switch to bruiser when you're your team's only damage threat or need to match enemy split-pushers 1v1.
What is the optimal jungle clear route for Skarner?
Red → Krugs → Raptors → Wolves → Blue → Gromp gets you level 4 by 3:15 with enough HP to contest scuttle. Full-clear both sides then back for Boots if no gank opportunities present themselves. Prioritize multi-monster camps (Krugs, Raptors) because Q's AoE clears them way faster than single-target camps.
Which runes work best with Skarner's crowd control?
Aftershock synergizes perfectly, triggering whenever you land Q stun or R suppression. Pair it with Demolish, Conditioning, and Unflinching in Resolve tree. Secondary Precision with Triumph and Legend: Tenacity. This maximizes survivability during engages while providing sustain and tenacity for ignoring CC.
How do you counter mobile junglers as Skarner?
You don't beat them in direct duels—you outvalue them through better ganks and teamfighting. Ward defensively, track their pathing, countergank when they appear on the map. Mobile junglers like Lee Sin and Nidalee scale worse than you, so surviving early game often means winning late game by default.
What items should you rush on Skarner?
Hollow Radiance first in 95% of games. It gives ability haste, health, clear speed, everything you need. Follow with boots (Steelcaps or Mercs), then Sunfire Aegis. Only deviate for extreme scenarios like full AD team (rush Randuin's) or four AP champions (Abyssal Mask rush).
When should you engage vs. peel as Skarner?
Engage when your team has follow-up damage and enemies have an isolated carry you can suppress safely. Peel when assassins or divers threaten your backline and nobody else on your team can protect them. Watch your carries' positioning—if they're safe, dive. If they're under pressure, stay close and peel instead.
The rework turned Skarner into what he always should've been: a reliable jungler who punishes bad positioning and rewards decisive plays. You're not going to 1v9 hard-carry every game, but you'll consistently create winning opportunities through well-timed suppressions and smart target selection.
Master the jungle routes to keep pace with faster farmers. Choose tank or bruiser builds based on what your team actually needs, not what feels more fun. Learn when to Flash-R into five enemies versus when to hold everything for peel. Track enemy QSS purchases and mobility cooldowns before committing your ultimate.
One perfectly-timed suppression decides more fights than perfect mechanics across an entire game. Focus on consistency over flashy outplays, and you'll climb steadily through reliable impact every single match.
Xilonen is one of Genshin Impact's most versatile Geo supports. This comprehensive guide covers optimal artifact sets, weapon choices, talent priorities, team compositions, and whether to build her as support or DPS, with detailed constellation breakdowns and expert tips
Master Windwalker Monk with this comprehensive BiS guide. Learn optimal stat priorities (Versatility > Crit > Mastery), acquire best-in-slot gear for each slot, understand tier set bonuses, execute the proper rotation, and configure essential WeakAuras for maximum DPS
Tingyun remains one of the most accessible and versatile support characters in Honkai: Star Rail. This guide covers her best light cones, optimal relic builds, team compositions, eidolon value, and advanced tips to maximize her ATK buffs and energy generation across all content
Syndra remains one of the most rewarding mages for players who master sphere manipulation. This comprehensive guide covers optimal rune configurations, core AP builds, essential combos, and matchup strategies that separate good Syndra players from great ones in 2026
The content on this website is provided for general informational and educational purposes only. It is intended to explain concepts related to video games, gaming guides, builds, mobile gaming, multiplayer strategies, and gaming history.
All information on this website, including articles, guides, and examples, is presented for general educational and entertainment purposes. Gameplay outcomes, strategies, and performance may vary depending on player skill, game updates, and platform.
This website does not provide professional advice or guarantee game outcomes, and the information presented should not be used as a substitute for official game documentation or developer guidance.
The website and its authors are not responsible for any errors or omissions, or for any outcomes resulting from decisions made based on the information provided on this website.